Volkswagen Tiguan Service and Repair Manual: Left Control Arm with Mounting Bracket, DSG and Automatic Transmission, Removing and Installing
Special tools and workshop equipment required
- Locating Pins -T10096-
- Engine and Gearbox Jack -VAS6931-
Removing
- Turn the steering wheel in the straight position and remove the ignition key so that the steering wheel lock engages.
Vehicles with "Keyless Access" Keyless Locking and Starting System
- Switch the ignition off and open the driver door so the steering wheel lock engages.
Continuation for All Vehicles
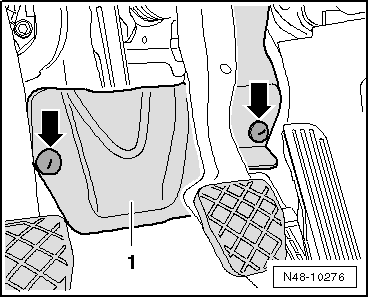
- Remove the nuts -arrows- and the footwell trim panel.
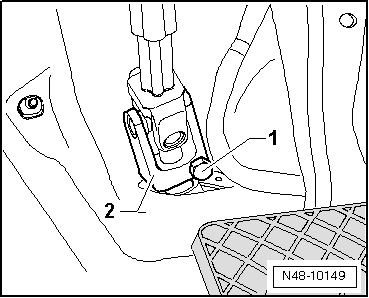
- Remove the bolt -1- and remove the universal joint -2- from the steering gear.
Caution
If the universal joint is separated from the steering gear, the following work cannot be performed:
- Connect the battery.
- Switching on the ignition
- Turning the steering gear
- Turning the steering column.
These points must be observed since performing these actions could cause irreparable damage.
- Remove left front wheel.
- Remove the lower noise insulation.
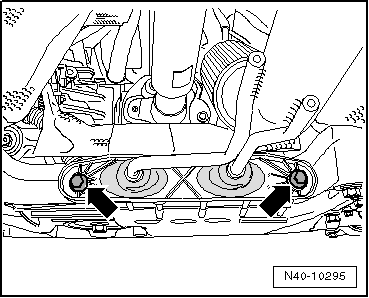
- Remove the exhaust system bracket from the subframe -arrows-.
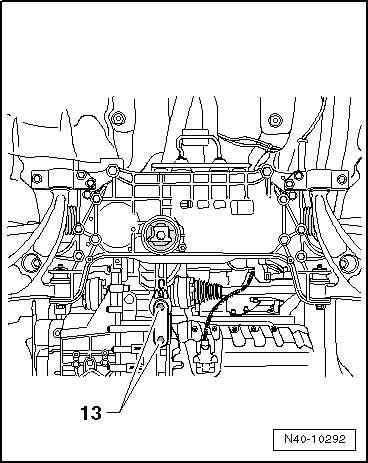
- Remove the bolts -13- and then remove the pendulum support from the transmission.
- Remove the nuts -arrows-.
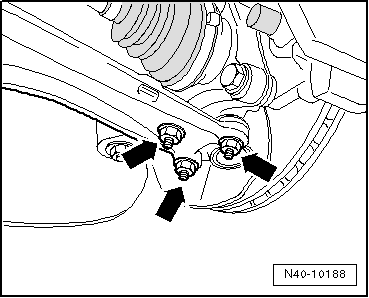
- Loosen the bolt -12-.
- Remove the coupling rods from the stabilizer bar.
- Secure the subframe.
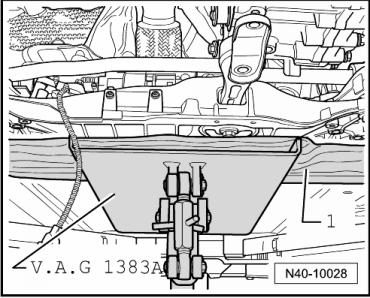
- Place the Engine and Gearbox Jack -VAS6931- under the subframe.
- Place for example a block of wood -1- between Engine/Gearbox Jack -VAG1383A- and subframe.
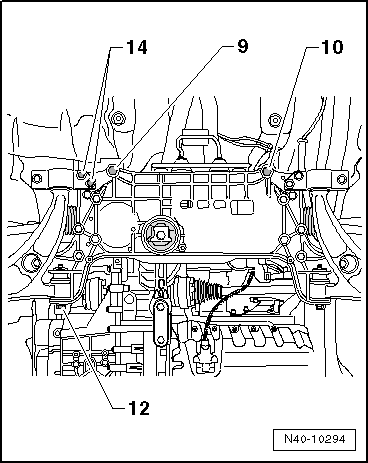
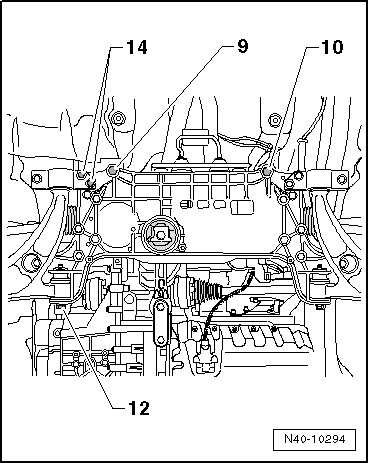
- Remove the bolts -9, 10 and 14- lower the subframe as far as necessary.
Note
Always pay attention to electrical wires for the steering.
- Remove the bolt -12-, and remove the control arm from the subframe.
Installing
Install in reverse order of removal.
- Install the lower noise insulation.
Note
Make sure the ball joint boot is not damaged or twisted.
Tightening Specifications
| Component | Tightening Specification |
Mounting bracket to body
|
70 Nm + 180º |
Stabilizer bar to
coupling rod
|
65 Nm |
Ball joint to aluminum
control arm:
|
60 Nm |
Ball joint to sheet steel
control arm
|
100 Nm |
Universal joint to
steering gear
|
30 Nm |
| Exhaust system bracket to subframe. | |
Tightening Specifications, Subframe to Body
| Bolt | Tightening Specification |
M12 x 1.5 x 90
|
70 Nm + 180º |
M12 x 1.5 x 100
|
70 Nm + 180º |
M12 x 1.5 x 110
|
70 Nm + 90º |
Tightening Specifications, Pendulum Support to the Transmission
| Bolt | Tightening Specification |
M10 x 35
|
50 Nm + 90º |
M10 x 75
|
50 Nm + 90º |
M12 x 1.5 x 85
|
60 Nm + 90º |
 Control Arm with Mounting Bracket, Removing and Installing
Special tools and workshop equipment required
Torque Wrench 1332 40-200Nm -VAG1332-
Locating Pins -T10096-
Removing
Remove the wheel.
Remove the lower noise insulation.
Remove the nuts -arrow ...
 Control Arm Bonded Rubber Bushing, Replacing
Special tools and workshop equipment required
Wishbone Rubber Mount Assembly Tool - Tube -T10219/1-
Wishbone Rubber Mount Assembly Tool - Drift -T10219/2-
Press Plate -VW402-
Press Piece - Rod -V ...
See More:
Volkswagen Tiguan Service and Repair Manual > SprayMax System: One-Part Clean Spray Can -LLS MAX 099-, -LLS MAX 100-, Aquaplus System
Definition:
One-Part Clean Spray Can -LLS MAX 099-, 250 ml for Water-Based Mixed
Paint "Aquaplus System"
One-Part Clean Spray Can -LLS MAX 100-, 400 ml for Water-Based Mixed
Paint "Aquaplus System"
Product Description
These products include a paint spray nozzle prefilled with a propellant ga ...
Volkswagen Tiguan Owners Manual
Volkswagen Tiguan Service and Repair Manual
- Body exterior
- Body Interior
- General Paint Information
- Paint
- Brake System
- Suspension, Wheels, Steering
- Wheel and Tire Guide
- Towing Guide
- Wheel and Tire Guide General Information
- Communication
- Electrical Equipment General Information
- Electrical Equipment from 06/2011
- Heating, Ventilation and Air Conditioning
- Refrigerant R134a Servicing
- 6-Speed Manual Transmission 02Q, OBB, and OFB
