Volkswagen Tiguan Service and Repair Manual: Pillar Trim Panels
Tools
Special tools and workshop equipment required
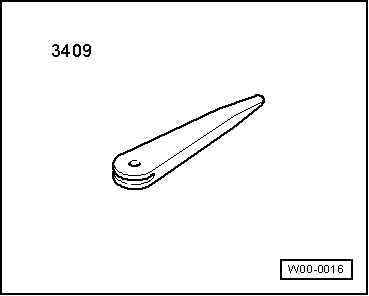
- Trim Removal Wedge -3409-
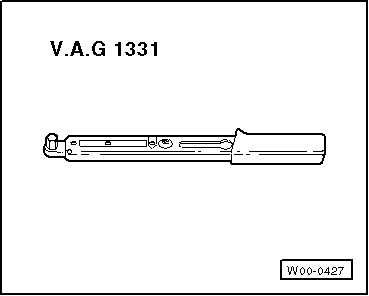
- Torque Wrench 1331 5-50Nm -VAG1331-
Upper A-Pillar Trim Panel, Removing and Installing
Note
The following describes the removing and installing on the left side of the vehicle. Removing and installing on the right side is identical.
Removing
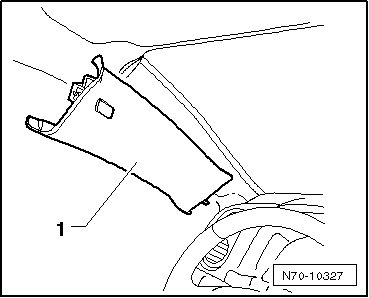
- Pull the trim panel -1- in the area of the "Airbag" labeling into the vehicle interior out of the catch in the A-pillar.
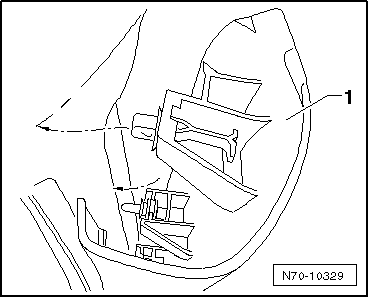
- Cut the clip -1- with a diagonal cutter.
- Remove the trim panel from the remaining mounts.
- Use suitable pliers to remove remaining part of the clip from the body.

Installing
- Replace the clip -1-"5N0.880.385.A".
- Mount the trim between the instrument panel and body.

- Lock the trim -1- in the corresponding mounts into the body.
- Mount the trim into the door seal molding.
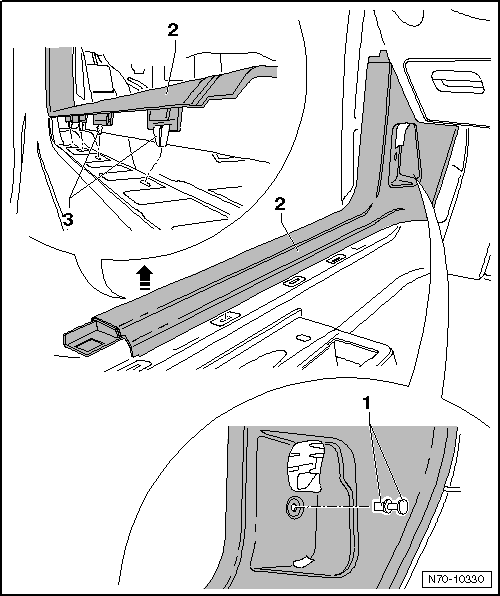
Driver Side Lower A-Pillar Trim, Removing and Installing
Removing
- Remove left, side instrument panel cover.
- Remove the hood release lever.
- Remove the upper trim on the left B-pillar from the brackets.
- Remove the lower trim on the left B-pillar.
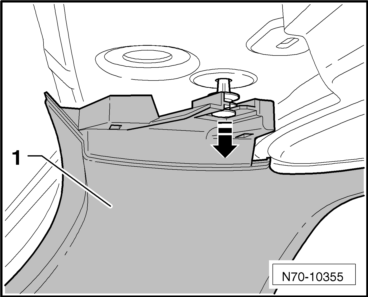
- Remove the clip -1-.
- Remove the trim -2- from the body -arrow-.
Installing
Note
- Before installation, the clip -1- must be checked for damage and replaced if necessary
- Before installing, check the mounting elements -3- and replace if necessary

- Install in reverse order of removal.
- Make sure, that the trim is placed in the in the door seal molding.
Front Passenger Side Lower A-Pillar Trim Panel, Removing and Installing
Removing
- Remove right side instrument panel cover.
- Remove the right B-pillar upper trim.
- Remove the lower trim on the right B-pillar.

- Remove the trim panel -1- from the body -arrow-.
Installing
Note
Before the assembly, check the clamps and replace them if necessary.
- Install in reverse order of removal.
- Make sure, that the trim is placed in the in the door seal molding.
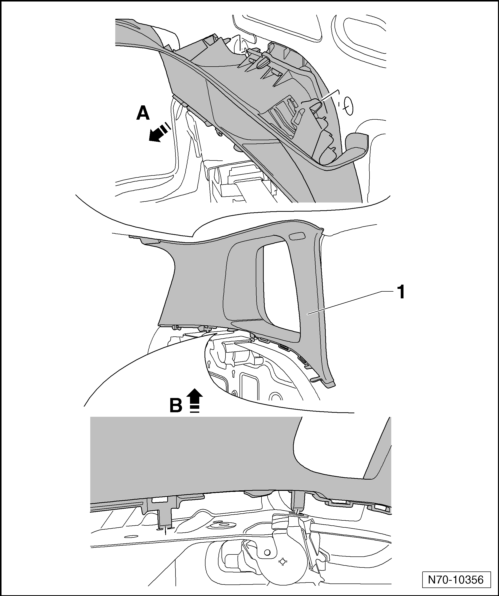
Upper B-Pillar Trim Panel, Loosening from Mounts and Securing
Note
The procedure describes loosening and securing on the right side of the vehicle. The loosening and securing procedure is the same for the left side.
Loosening
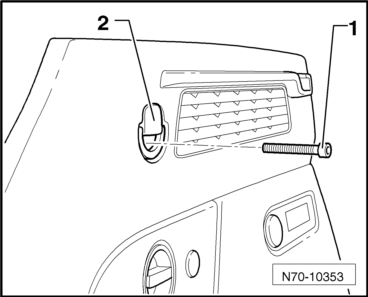
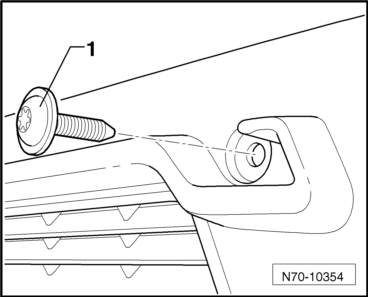
- Remove the airbag emblem -1- using the Trim Removal Wedge -3409- and remove the bolt -2- (4 Nm).
- Pull the trim panel at the bottom slightly apart sideways and remove the it downward out of the retainers in the B-pillar trim panel -arrow A-.
- Remove the trim from the door seal molding.
- Pull the trim panel out of top mounts -arrow B-.
Securing
Note
When installing, the airbag emblem -1- must be replaced.
- Move the seat belt height adjuster -3- into the highest position.
- Move the slide -4- in the trim panel to the highest position.
- Installation is performed in reverse order of the removal.
After installation, perform the following function test on the belt height adjuster:
- Operate the belt height adjuster slider and position the belt height adjuster in highest position.
- Pull the seat belt downward.
- The belt height adjuster must engage in highest lock position when doing so.

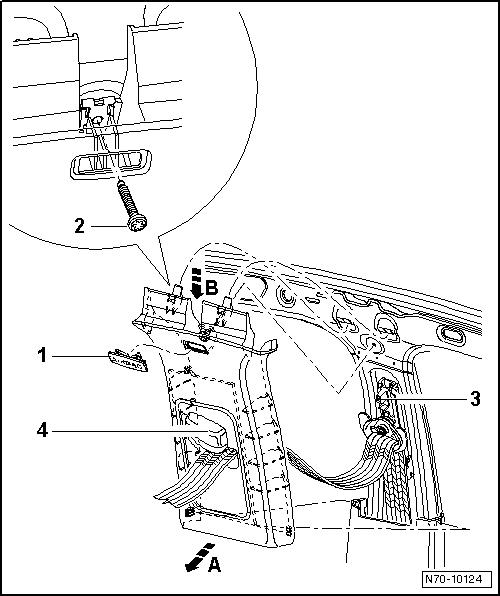
Upper B-Pillar Trim Panel, Removing and Installing
Note
The following describes removing and installing on the right side of the vehicle. Removing and installing on the left side is identical.
- Remove the B-pillar upper trim panel.
- Remove the B-pillar lower trim panel.
- Remove the bolt -1- (40 Nm) and remove the belt end fitting -2- from body.
- Guide the belt end fitting through the opening in the trim panel.
Installing
Note
Before the assembly, check the clamps and replace them if necessary.
- Install in reverse order of removal.
- Make sure, that the trim is placed in the in the door seal molding.
Lower B-Pillar Trim Panel, Removing and Installing
Note
The following describes the removing and installing on the left side of the vehicle. Removing and installing on the right side of the vehicle is identical.
Removing
Vehicles with Interior Monitoring (Driver Side)
- Switch off the ignition.
All Vehicles
- Remove the B-pillar upper trim panel.
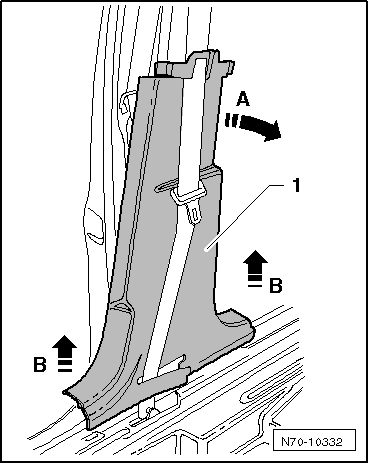
- Remove the trim -1- at the top form the body -arrow A-.
- Remove the trim upward out of the mounts in the sill-side -arrows B-.

- Open the door -1- and guide the seat belt -2- through it.
Installing
Note
Before the assembly, check the clamps and replace them if necessary.
- Install in reverse order of removal.
- Make sure, that the trim is placed in the in the door seal molding.
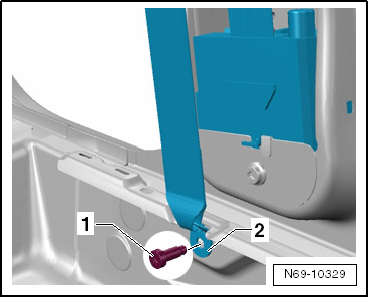
C-Pillar Trim Panel, Removing and Installing
Note
The following describes the removing and installing on the left side of the vehicle. Removing and installing on the right side of the vehicle is identical.
Removing
- Remove roof end strip.
- Remove the rear wheel housing trim panel.
- Vehicles without rear side airbag.
- Vehicles with rear side airbag.
- Remove the screw -1- from the side luggage compartment trim panel (1.5 Nm).
- Remove the bracket -2-, as an alternative a trim can be removed.
- Remove the screw -1- (1.5 Nm) in the luggage compartment cover mount.
- Remove the luggage compartment side trim panel at the top, from the mounts.
- Remove the C-pillar trim -1-, in the upper area, from the retainers in the roof crossmember -arrow-.
- Carefully unclip the airbag emblem on vehicles with head curtain airbags.
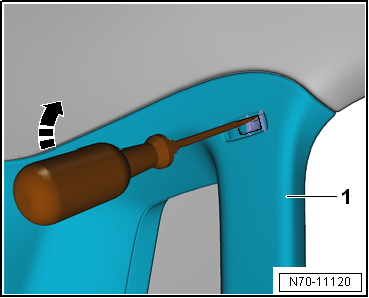
- Use a screwdriver to unlock the clips in the trim panel -1--arrow-.
- Remove the trim panel -1-, in the upper area, from the mounts -arrow A-.
- Remove the trim panel, in the lower area, from the mounts -arrow B-.
Installing
Note
Before the assembly, check the clips for damage and replace if necessary.
- Install in reverse order of removal.
- Make sure the trim panel molding is placed in the door and cover seal piping.
 Door Trim Panels
Tools
Required Special Tools and Testing Equipment
Trim Removal Wedge -3409-
Trim Release Lever - Wedge -T10039/1-
Torque Wrench 1783 - 2-10Nm -VAG1783-
Front Door Trim Panel, Removing and ...
 Rear Lid Trim Panel
Upper Rear Lid Window Trim Panel, Removing and Installing
Removing
Remove the center trim panel -1- from the
mounts in the rear lid.
Remove the side trim panel from the mounts -2-
and -3-.
I ...
See More:
Volkswagen Tiguan Service and Repair Manual > Hood, Lids: Fuel Filler Door Unit
Overview - Fuel Filler Door Unit and Adjusting Element
Note
If tank flap does not open, it can be opened by hand via the actuator
-4-.
The actuator can be reached by grabbing between the side panel and
loosened wheelhouse liner.
Fuel Filler Door Unit
Removing and installing
Bolt
...
Volkswagen Tiguan Owners Manual
Volkswagen Tiguan Service and Repair Manual
- Body exterior
- Body Interior
- General Paint Information
- Paint
- Brake System
- Suspension, Wheels, Steering
- Wheel and Tire Guide
- Towing Guide
- Wheel and Tire Guide General Information
- Communication
- Electrical Equipment General Information
- Electrical Equipment from 06/2011
- Heating, Ventilation and Air Conditioning
- Refrigerant R134a Servicing
- 6-Speed Manual Transmission 02Q, OBB, and OFB
