Volkswagen Tiguan Service and Repair Manual: Clutch, Removing and Installing
Clutch, Removing and Installing, with Dual Mass Flywheel, Sachs
Special tools and workshop equipment required
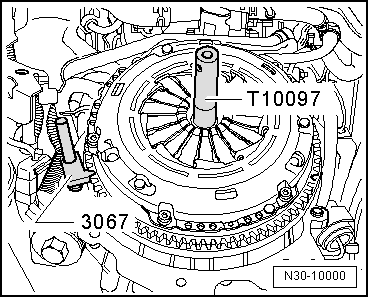
- Flywheel Retainer -3067-
- Alignment Tool - Clutch Plate -T10097-
- Torque Wrench 1331 5-50Nm -VAG1331-
- Grease for Clutch Disc Shaft Splines
- Grease allocation. Refer to the Parts Catalog.
- On engines which have a crankshaft with a smaller diameter, or engines with a needle bearing in the crankshaft.
Removing
The transmission is removed.
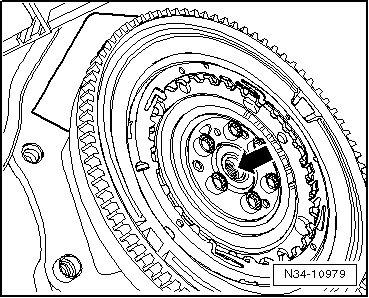
- Insert the Flywheel Retainer -3067- to loosen the bolts.
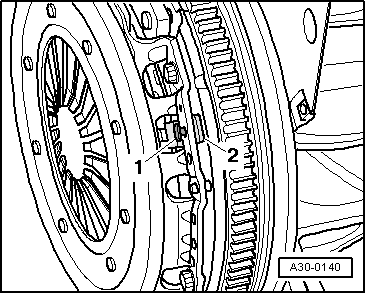
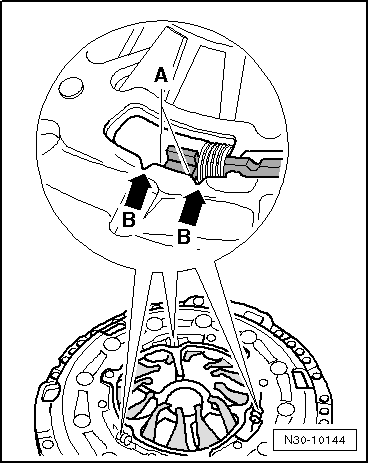
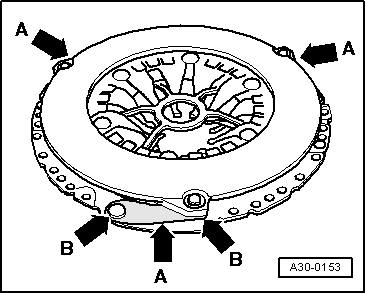
When Removing, Loosen the Bolts as Follows so That the Clutch Pressure Plate Does Not Distort (Causing Shuddering on Acceleration):
- Loosen the bolt diagonally in small steps.
When loosening, the stop -2- and the bolt -1- must loosen up together.
- If the stop does not loosen: push the bolt toward the dual mass flywheel.
- Remove the pressure plate and the clutch plate.
Installing
Install in the reverse order of removal while noting the following:
Note
- Allocate clutch pressure plate and clutch plate according to the engine code. Refer to the Parts Catalog.
- Clean the input shaft splines and (on used clutch plates) the hub splines. Remove any corrosion and then apply a very thin coat of Lubricant on the splines. Then move the clutch plate back and forth on the input shaft until the hub moves freely on the shaft. Remove any excess grease.
- The clutch pressure plates are corrosion-protected and greased. With the exception of the friction surface on the clutch plate, do not clean the clutch pressure plate. This will shorten the service life of the clutch considerably.
- The friction surfaces on the clutch pressure plate and on the flywheel must be cleaned thoroughly (degreased).
- To reduce odor caused by a burnt clutch, thoroughly clean the transmission housing around the clutch as well as the engine on the transmission side.
- Only use compressed air to clean the dual mass flywheel.
- The clutch plate linings must sit completely on the flywheel and on the clutch pressure plate friction surface. Install the bolts.
- Tighten the bolts diagonally in small steps so as to not damage the centering holes in the pressure plate and the centering pins on the flywheel.
- Make sure the alignment sleeves for centering the engine/transmission are installed inside the cylinder block. Install them if necessary.
- If the alignment sleeves are missing, it will be difficult to shift, there will be clutch problems and the transmission may make noises (loose rattling).
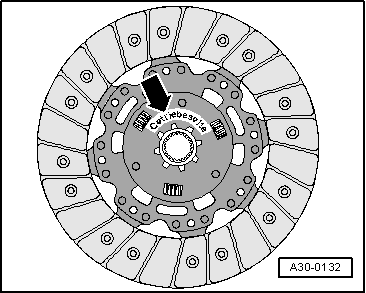
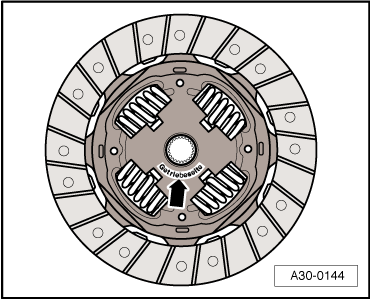
Clutch Plate Installed Position
- "Transmission side" label and the spring cage face the transmission.
Check the Ends of the Diaphragm Spring
- Wear up to half the thickness of the diaphragm spring -arrows- is permitted.

Checking the Spring Connections and Rivet Connections
- Pull-spring OK
- Slight offset in the outer area -arrows A-.
- Pull-springs damaged
- The clutch pressure plates must be replaced if the pull-spring is bent or broken off -arrow B-.

Checking the Spring Connections and Rivet Connections
- Check the spring connections between the pressure plate and the cover for cracks and make sure the rivet connections are tight.
- Replace the pressure plate if the spring connections are damaged or if the rivet connections -arrows- are loose.
- Use the Flywheel Retainer -3067- when installing.
Engines Having a Crankshaft with a Smaller Diameter -arrow-, or Engines Having a Needle Bearing -arrow- in the Crankshaft

Centering the Clutch Disc, Removing and Installing the Pressure Plate on Engines with a Crankshaft with a Smaller Diameter, or Engines with a Needle Bearing in the Crankshaft.
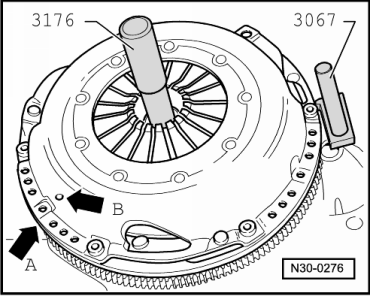
Note
Ignore arrows -A and B-.
Continuation for All
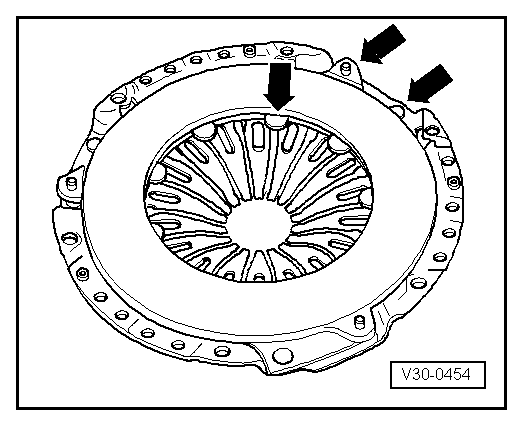
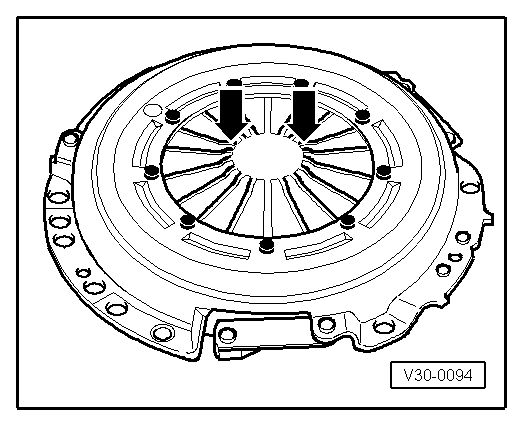
When Installing, Tighten Bolts as Follows so Pressure Plate Does Not Distort (Causing Shuddering on Acceleration):
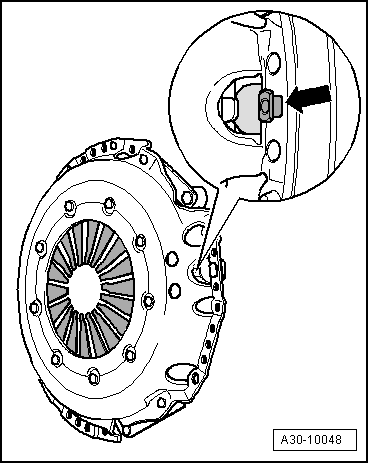
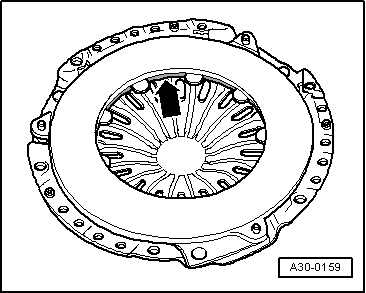
- Make sure the stop pin (position sensor) -arrow- moves easily.
- Install the pressure plate on the centering pins.
- Install all bolts evenly, by hand, until the bolt heads touch the pressure plate.
- Tighten the bolt diagonally in small steps.
When doing this, the stop pin -arrow- must lift off from the pressure plate.
- Install the transmission.
Tightening Specifications
- Pressure plate on the flywheel.
Clutch, Removing and Installing, with Dual Mass Flywheel, LuK
Special tools and workshop equipment required
- Flywheel Retainer -3067-
- Alignment Tool - Clutch Plate -T10097-
- Torque Wrench 1331 5-50Nm -VAG1331-
- Grease for Clutch Disc Shaft Splines
- Grease allocation. Refer to the Parts Catalog.On engines which have a crankshaft with a smaller diameter, or engines with a needle bearing in the crankshaft.
Removing
The transmission is removed.
- Insert the Flywheel Retainer -3067- to loosen the bolts.
- Loosen the bolt diagonally in small steps.
- Remove the pressure plate and the clutch plate.
Installing
Install in the reverse order of removal while noting the following:
Note
- Allocate clutch pressure plate and clutch plate according to the engine code. Refer to the Parts Catalog.
- Clean the input shaft splines and (on used clutch plates) the hub splines. Remove any corrosion and then apply a very thin coat of Lubricant on the splines. Then move the clutch plate back and forth on the input shaft until the hub moves freely on the shaft. Remove any excess grease.
- The clutch pressure plates are corrosion-protected and greased. With the exception of the friction surface on the clutch plate, do not clean the clutch pressure plate. This will shorten the service life of the clutch considerably.
- The friction surfaces on the clutch pressure plate and on the flywheel must be cleaned thoroughly (degreased).
- To reduce odor caused by a burnt clutch, thoroughly clean the transmission housing around the clutch as well as the engine on the transmission side.
- Only use compressed air to clean the dual mass flywheel.
- The clutch plate linings must sit completely on the flywheel and on the clutch pressure plate friction surface. Install the bolts.
- Tighten the bolts diagonally in small steps so as to not damage the centering holes in the pressure plate and the centering pins on the flywheel.
- Make sure the alignment sleeves for centering the engine/transmission are installed inside the cylinder block. Install them if necessary.
- If the alignment sleeves are missing, it will be difficult to shift, there will be clutch problems and the transmission may make noises (loose rattling).
Clutch Plate Installed Position
- "Transmission side" label faces the transmission.

Check the Ends of the Diaphragm Spring
- Wear up to half the thickness of the diaphragm spring -arrows- is permitted.
Checking the Pull-Springs and Rivet Connection
- Pull-spring OK
- Slight offset in the outer area -arrows A-.
- Pull-springs damaged
- The clutch pressure plates must be replaced if the pull-spring is bent or broken off -arrow B-.

Checking the Spring Connections and Rivet Connections
- Make sure the rivet connections -arrows B- fit correctly on all pull-springs -arrows A-.
- Replace any clutch pressure plates that have loose rivet connections -arrows B-.

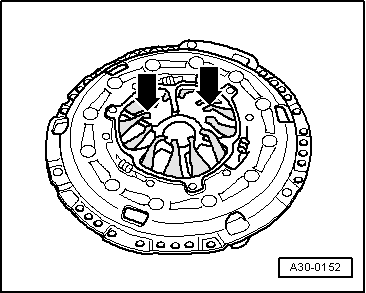
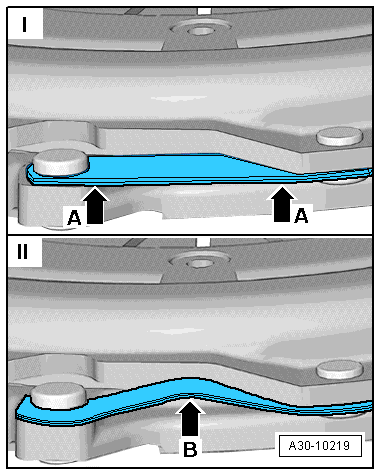
Only Check Position of Adjustment Mechanism with New Pressure Plates
- Both edges -A- of the adjusting ring must be located between both notches -arrows B-.
- If the adjusting ring takes on a different position with new pressure plates, pressure plate and clutch plate must not be installed.
- With used clutches, the adjusting ring may take on a position outside of the notches.
- Use the Flywheel Retainer -3067- when installing.

Engines Having a Crankshaft with a Smaller Diameter -arrow-, or Engines Having a Needle Bearing -arrow- in the Crankshaft
Centering the Clutch Disc, Removing and Installing the Pressure Plate on Engines with a Crankshaft with a Smaller Diameter, or Engines with a Needle Bearing in the Crankshaft.

Note
Ignore arrows -A and B -.
Continuation for All
When Installing, Tighten Bolts as Follows so Pressure Plate Does Not Distort (Causing Shuddering on Acceleration):
- Install the pressure plate on the centering pins.
- Install all bolts evenly, by hand, until the bolt heads touch the clutch pressure plate.
- Tighten the bolt diagonally in small steps.
- Install the transmission.
Tightening Specifications
- Pressure plate on the flywheel.
Clutch, Removing and Installing, with Single Flywheel
Special tools and workshop equipment required
- Flywheel Retainer -3067-
- Alignment Tool - Clutch Plate -T10097-
- Torque Wrench 1331 5-50Nm -VAG1331-
- Grease for Clutch Disc Shaft Splines
- Grease allocation. Refer to the Parts Catalog.
Removing
Transmission is removed.
- Insert the Flywheel Retainer -3067- to loosen the bolts.
When Removing, Loosen the Bolts as Follows so That the Clutch Pressure Plate Does Not Distort (Causing Shuddering on Acceleration):
- Loosen all screws clockwise one after the other in stages of 90º until clutch pressure plate is free.
- Remove the pressure plate and the clutch plate.
Installing
Note
- Allocate clutch pressure plate and clutch plate according to the engine code. Refer to the Parts Catalog.
- Clean the input shaft splines and (on used clutch plates) the hub splines. Remove any corrosion and then apply a very thin coat of Lubricant on the splines. Then move the clutch plate back and forth on the input shaft until the hub moves freely on the shaft. Remove any excess grease.
- The clutch pressure plates are corrosion-protected and greased. With the exception of the friction surface on the clutch plate, do not clean the clutch pressure plate. This will shorten the service life of the clutch considerably.
- The friction surfaces on the clutch pressure plate and on the flywheel must be cleaned thoroughly (degreased).
- To reduce odor caused by a burnt clutch, thoroughly clean the transmission housing around the clutch as well as the engine on the transmission side.
- The clutch plate linings must sit completely on the flywheel and on the clutch pressure plate friction surface. Install the bolts.
- Tighten the bolts diagonally in small steps so as to not damage the centering holes in the pressure plate and the centering pins on the flywheel.
- Make sure the alignment sleeves for centering the engine/transmission are installed inside the cylinder block. Install them if necessary.
- If the alignment sleeves are missing, it will be difficult to shift, there will be clutch problems and the transmission may make noises (loose rattling).
Clutch plate installed location: The labeling "Getriebeseite" (transmission side) or the spring cage faces the pressure plate.
Check the Ends of the Diaphragm Spring
- Wear up to half the thickness of the diaphragm spring -arrows- is permitted.
Check the Spring Connection and Rivet Connections
- Check the spring connection between the pressure plate and the cover for cracks and make sure the rivet connections are tight.
- Replace the pressure plate if the springs are damaged or if the rivet connections -arrows- are loose.

Checking the Pull-Springs and Rivet Connection
- Pull-spring OK
- Slight offset in the outer area -arrows A-.
- Pull-springs damaged
- The clutch pressure plates must be replaced if the pull-spring is bent or broken off -arrow B-.
- Check the spring connections -arrows A- for damage and make sure the rivet connections -arrows B- are tight.
- Replace a clutch pressure plate with severely kinked or broken spring connections and loose rivet connections.
- Make sure the rivet connections -arrows B- fit correctly on all pull-springs -arrows A-.
- Tighten all bolts clockwise to the final tightening specification.
- Replace any clutch pressure plates that have loose rivet connections -arrow B-.
Checking the Metal Ring
- Check the metal ring in the clutch pressure plate -arrow- for damage.
- Replace any clutch pressure plates that have a broken metal ring.
- Use the Flywheel Retainer -3067- when installing.
- Tighten the bolt diagonally in small steps.
- Install the transmission.

Tightening Specifications
- Pressure plate on the flywheel.
Special Tools

Special tools and workshop equipment required
- Flywheel Retainer -3067-
- Alignment Tool - Clutch Plate -T10097-
- Torque Wrench 1331 5-50Nm -VAG1331-
- Grease for Clutch Disc Shaft Splines -G 000 100-
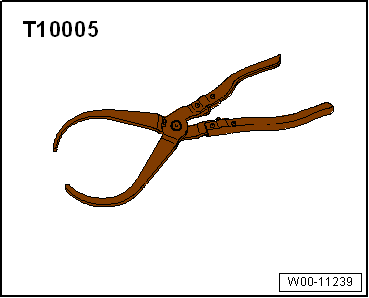
- Clutch Pedal Pliers -T10005-
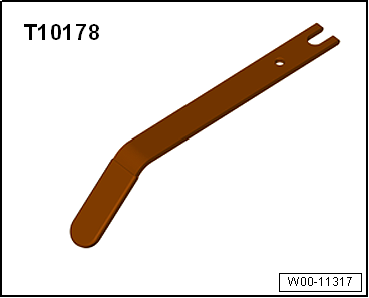
- Over-Center Spring Assembly Tool -T10178-
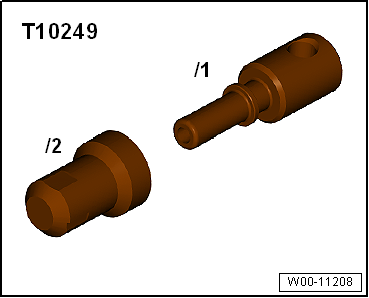
- Sealing Tool -T10249-
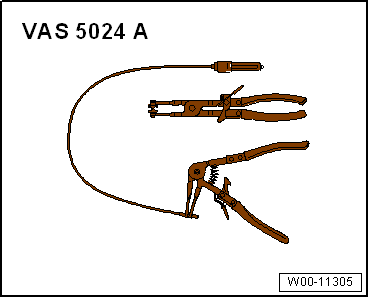
- Hose Clip Pliers -VAS5024A-
- Brake Charger/Bleeder Unit -VAS5234-

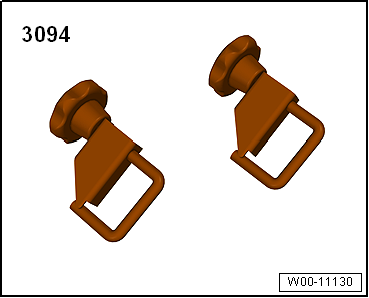
- Hose Clamps - Up To 25 mm -3094-
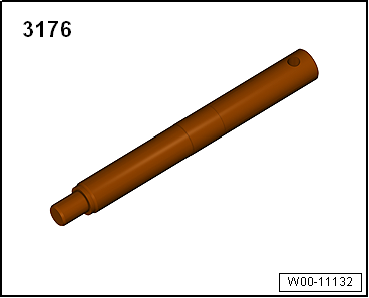
- On engines which have a crankshaft with a smaller diameter, or engines with a needle bearing in the crankshaft. Refer to → Fig. ""Centering the Clutch Disc, Removing and Installing the Pressure Plate on Engines with a Crankshaft with a Smaller Diameter, or Engines with a Needle Bearing in the Crankshaft.""Centering Pin -3176-.
- Not Illustrated:
- Engine Bung Set -VAS6122-
- Piston Pin Drift -VW207-
 Clutch Manufacturers, Differentiating
Clutch Manufacturers, Differentiating
Only Vehicles with 2.0L Turbo Diesel Engine
Either a "Sachs" or a "LuK" clutch may be installed.
It is possible to tell which clutch the vehicle has with the tran ...

See More:
Volkswagen Tiguan Owners Manual > Climate control / Heating and air conditioning: Air recirculation
Read and follow the introductory information and
safety information first⇒Introduction
to the subject General information
The air recirculation mode helps prevent outside air from entering the vehicle
interior
In very hot outside temperatures, temporarily switch to air recirculation in
...
Volkswagen Tiguan Owners Manual
Volkswagen Tiguan Service and Repair Manual
- Body exterior
- Body Interior
- General Paint Information
- Paint
- Brake System
- Suspension, Wheels, Steering
- Wheel and Tire Guide
- Towing Guide
- Wheel and Tire Guide General Information
- Communication
- Electrical Equipment General Information
- Electrical Equipment from 06/2011
- Heating, Ventilation and Air Conditioning
- Refrigerant R134a Servicing
- 6-Speed Manual Transmission 02Q, OBB, and OFB
