Volkswagen Tiguan Service and Repair Manual: Cavity Sealing
Cavity Sealing, Body General View
Note
The displayed areas are cavity-sealed and must be sealed again after completing the repair work.
Cavity Sealing General View
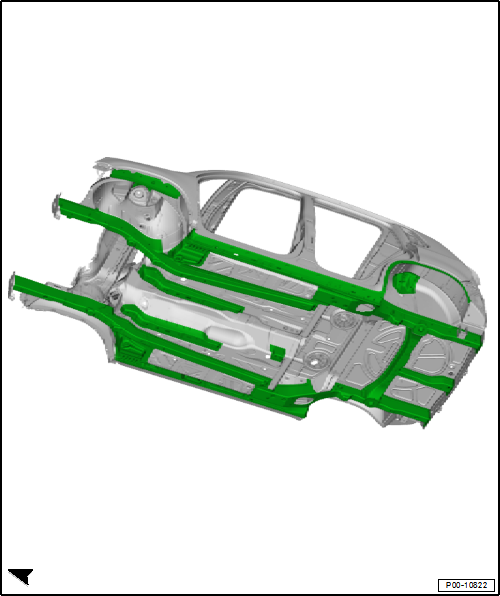
Cavity Sealing, Body Front
Note
The displayed areas are cavity-sealed and must be sealed again after completing the repair work.
Cavity Sealing Side View
Left side shown, right side is a mirror image
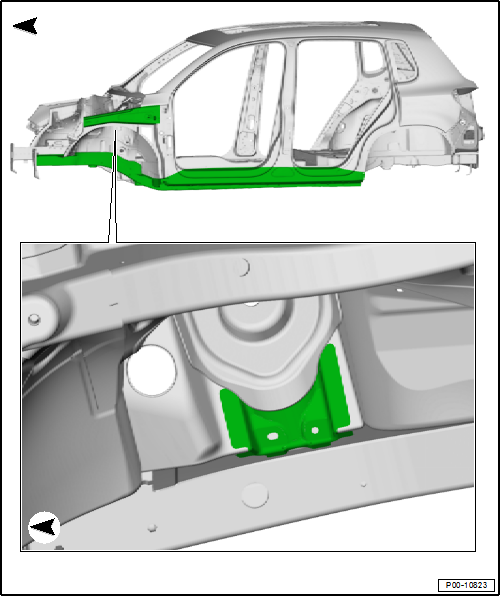
Note
The displayed areas are cavity-sealed and must be sealed again after completing the repair work.
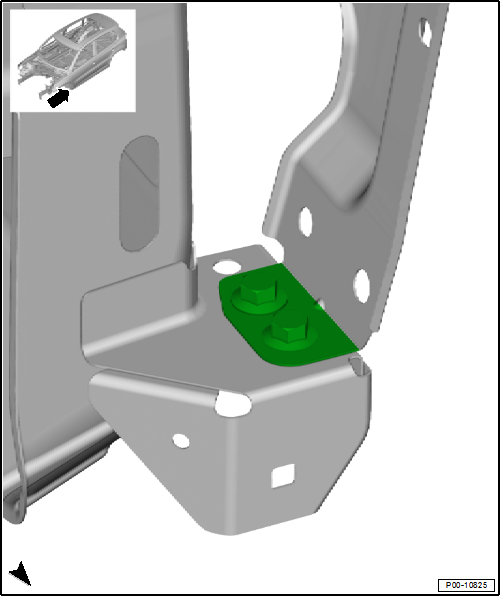
Cavity Sealing, Detailed View of Fender
Left side shown, right side is a mirror image
Cavity Sealing, Body Center
Note
The displayed areas are cavity-sealed and must be sealed again after completing the repair work.
Door Cavity Sealing
The upper illustration shows the front door, the lower illustration shows the rear door.
Left side shown, right side is a mirror image.
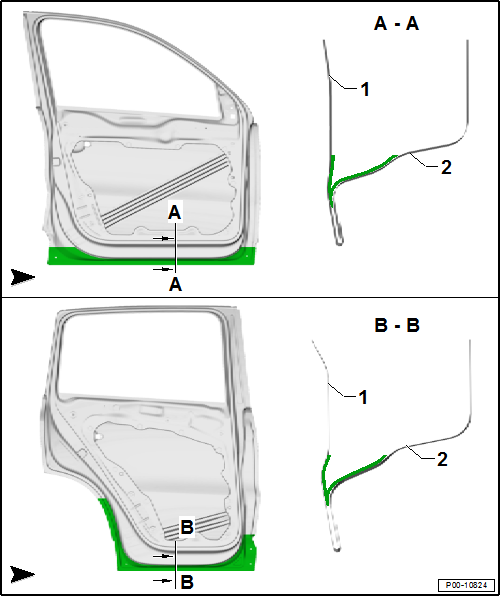
- Outer Door Panel
- Inner Door Panel
Cavity Sealing, Body Rear
Note
The displayed areas are cavity-sealed and must be sealed again after completing the repair work.
Rear Lid Cavity Sealing
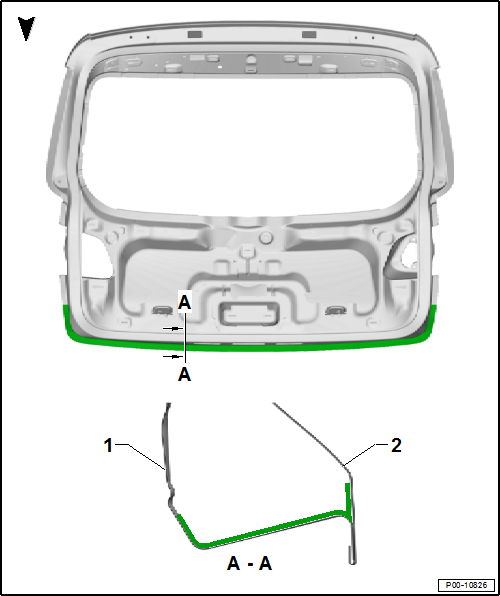
- Inner Rear Lid Panel
- Outer Rear Lid Panel
Contrasting Colors
Contrasting Colors, Tiguan
Contrasting Colors in the Side Sill Area
Left side shown, right side is a mirror image
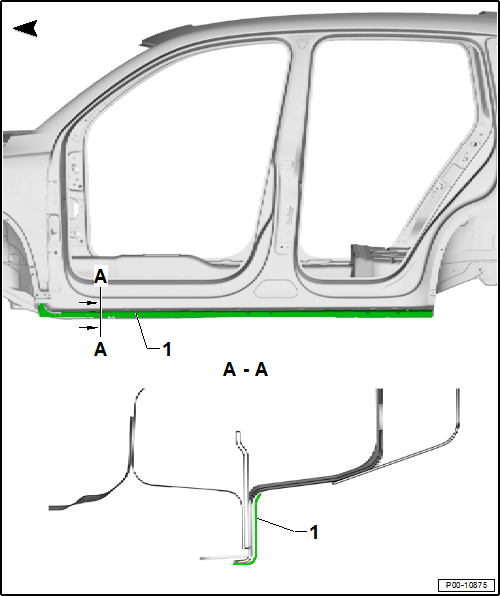
- Side Sill
- Depending on the equipment/exterior paint; color: L-041 black or L-C9X Deep Black
Contrasting Colors, Tiguan, "CityScape"
Contrasting Colors "CityScape"
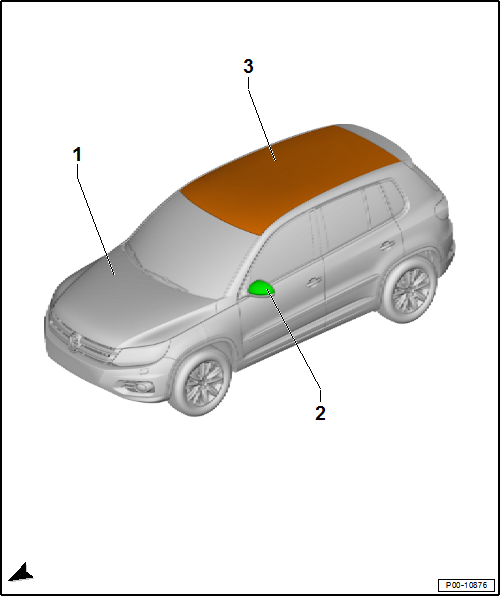
- Entire Vehicle
- Color: various colors
- Mirror Cap
- Color: L-041 black
- Roof
- Color: L-041 black
Note
On vehicles that are completely painted with the color L-C9X Deep Black, the roof is also painted with L-C9X Deep Black.
Edition: K0059112021 - 03/27/2015 - FU/RF - JY
 Underbody Protection
Underbody Protection Protected Areas, Body Overview with Different
Coating Densities
Note
The underbody protection (stone impact protection) is to be repaired
according to its original conditions ...
 Brake System
...
See More:
Volkswagen Tiguan Owners Manual > Lights: Lights and Vision features
Read and follow the introductory information and
safety information first⇒Introduction
to the subject Daytime running lights
Separate lamps are installed in the headlights or in the front bumper for the
daytime running lights.
When the daytime running lights are switched on, only these s ...
Volkswagen Tiguan Owners Manual
Volkswagen Tiguan Service and Repair Manual
- Body exterior
- Body Interior
- General Paint Information
- Paint
- Brake System
- Suspension, Wheels, Steering
- Wheel and Tire Guide
- Towing Guide
- Wheel and Tire Guide General Information
- Communication
- Electrical Equipment General Information
- Electrical Equipment from 06/2011
- Heating, Ventilation and Air Conditioning
- Refrigerant R134a Servicing
- 6-Speed Manual Transmission 02Q, OBB, and OFB
