Volkswagen Tiguan Service and Repair Manual: Front Seats
Tools
Special tools and workshop equipment required
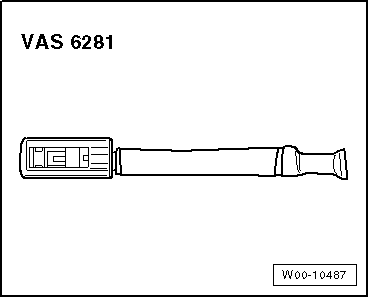
- Airbag Lockout Adapter - VAS6281-
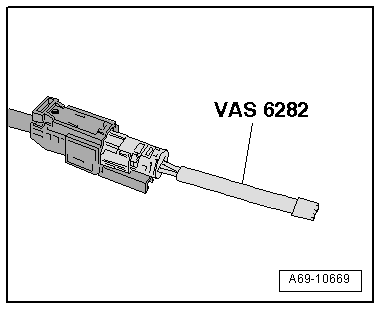
- Airbag Lockout Adapter -VAS6282-
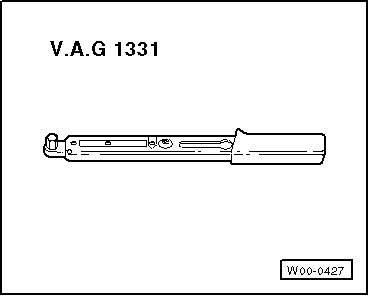
- Torque Wrench 1331 5-50Nm -VAG1331-
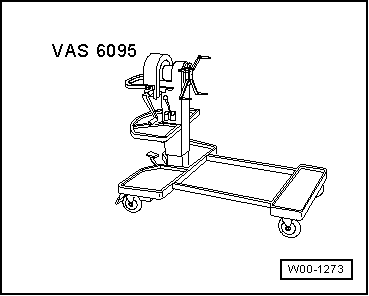
- Engine and Gearbox Bracket VAS6095A -VAS6095A-
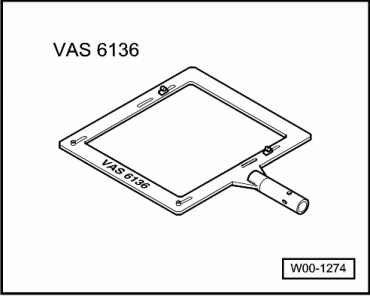
- Engine/Transmission Holder - Seat Repair Fixture -VAS6136-
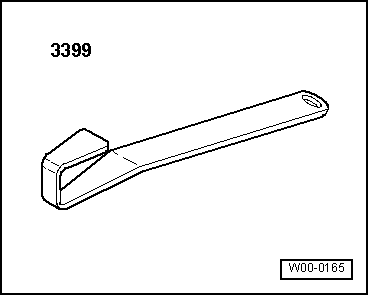
- Assembly Tool -3399-
Front Seat, Removing and Installing
Note
- The following describes the removing and installing on the left side of the vehicle. Removing and installing on the right side is identical.
- The following describes removing and installing a manual seat. Removing and installing a power seat is identical.
Removing
WARNING
Observe the safety precautions when working on airbags.
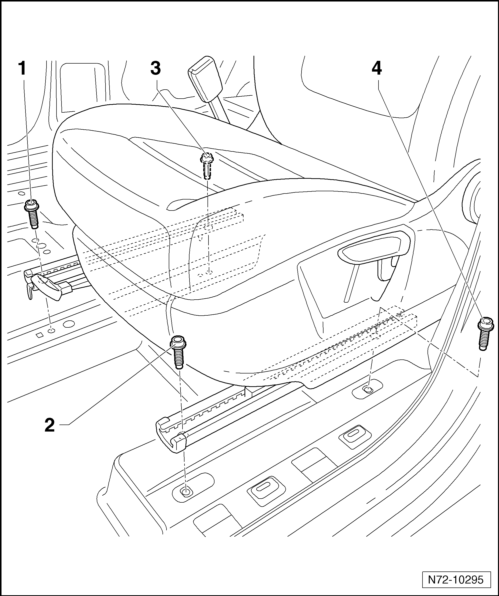
- Position the seat as far forward as possible using the forward/back adjustment.
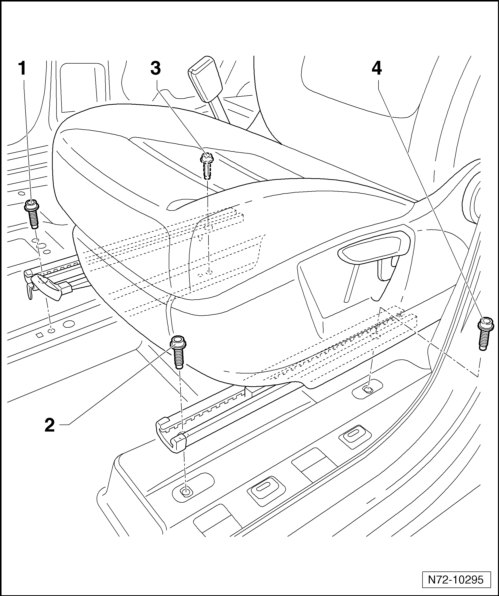
- Remove the bolts -3- and -4-.
- Position seat as far back as possible using the seat forward/back adjustment.
- Disconnect the vehicle battery.
- Remove the bolts -1- and -2-.
- Remove the wiring harness from mount in floor.
WARNING
Electrostatic discharges can lead to unintended deployment of the airbag. Therefore, the technician must discharge static electricity from the body before disconnecting the ignition wire and ground wire. This is done, for example, by briefly touching the body or the door striker.
- Depending on vehicle equipment, disconnect seat wiring harnesses from connector station.
Caution
If seat is to be lifted out or transported out of the vehicle, it must not be grasped by the attachments, for example, seat belt latch, lever for seat fore/aft adjustment, lever for seat height adjustment or seat trim panels in order to prevent damage.
- Reach with the right hand between backrest and seat cushion, grasp with the left hand onto the front end of seat cushion and lift the seat out of the vehicle.
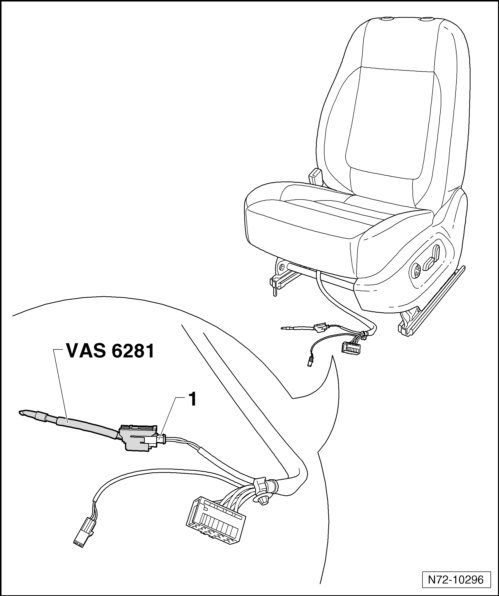
- Connect the Airbag Lockout Adapter -VAS6281- to the side airbag wiring harness -1-.
- If the Airbag Lockout Adapter -VAS6281- does not fit, use the Airbag Lockout Adapter -VAS6282-.
Caution
The Airbag Lockout Adapter -VAS6281- or the Airbag Lockout Adapter -VAS6282- must stay connected to the seat until the seat is reinstalled.
Installing
- Lift the seat through the front doors and into the vehicle.
- Insert the seat into corresponding openings in floor via the centering pins on the tunnel-side.
- Install the screw -1-, tunnel side.
- Remove the Airbag Lockout Adapter - VAS6281- or the Airbag Lockout Adapter -VAS6282-.
- Engage the wiring harness for the side curtain airbag in the connector station.
- Engage the remaining wiring harnesses in connector station, depending on vehicle equipment.
- Switch the ignition on.
WARNING
Make sure that no persons are in the vehicle.
- Connect the battery.
- Position the seat as far forward as possible using the forward/back adjustment.
- Tighten the bolt -3-, tunnel side (40 Nm).
- Tighten the bolt -4-, door sill side (40 Nm).
- Position seat as far back as possible using the seat forward/back adjustment.
- Tighten the bolt -3-, tunnel side (40 Nm).
- Tighten the bolt -2-, door sill side (40 Nm).
WARNING
When installing the seat, if a thread in mounting plate of seat crossmember was damaged, a reworking of the damaged thread is forbidden. In this case, the seat crossmember mounting plate must be replaced.
If there is Damage to Threads in the Seat Crossmember Mounting Plate:
- Replace the affected seat crossmember mounting plate.
Tunnel-Side Trim Panel, Removing and Installing
Note
The following describes the removing and installing on the left side of the vehicle. Removing and installing on the right side is identical.
Removing
Note
Removing and installing the trim is identical for seats equipped with a pass-through.
- Remove the front seat.
- Remove the front seat belt latch.
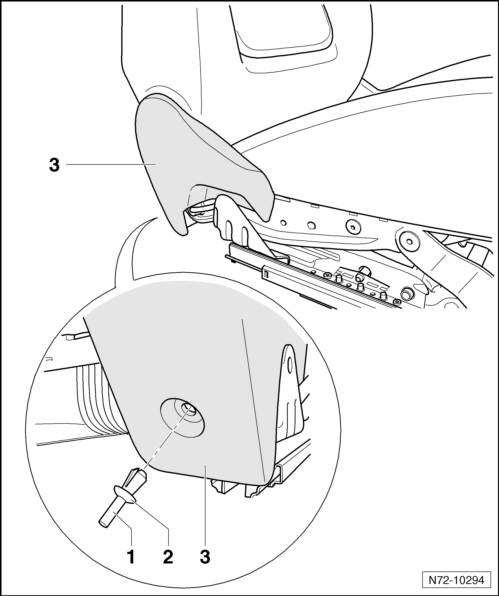
- Press the clamping pin -1- inward and remove it from the expanding clip -2-.
- Remove the expanding clip.
- Remove the trim -3- from the mounts in the seat frame.
Installing
- Install in reverse order of removal.
Backrest Adjusting Wheel, Removing and Installing
The backrest adjustment wheel is installed on the following seats:
- Front Seats with Manual Height Adjustment
- Passenger Seat without Height Adjustment
Note
The following describes the removing and installing on the left side of the vehicle. Removing and installing on the right side is identical.
Removing
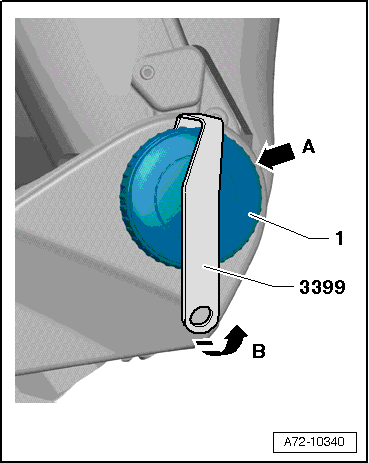
- Turn the backrest adjustment wheel -1- until a retainer -arrow A- can be seen from the back. Use a flashlight if necessary.
- Turn backrest adjustment wheel about 120º more.
- Engage the Assembly Tool -3399- and pry it in the direction of the -arrow B-.
- Remove the backrest adjustment wheel.
Installing
- Replace the backrest adjustment wheel if it is too loose after assembling.
Drawer Mount, Removing and Installing
The drawer mount is an option on the following seats:
- Front Seats with Manual Height Adjustment
- Passenger Seat with Pass-Through
Removing
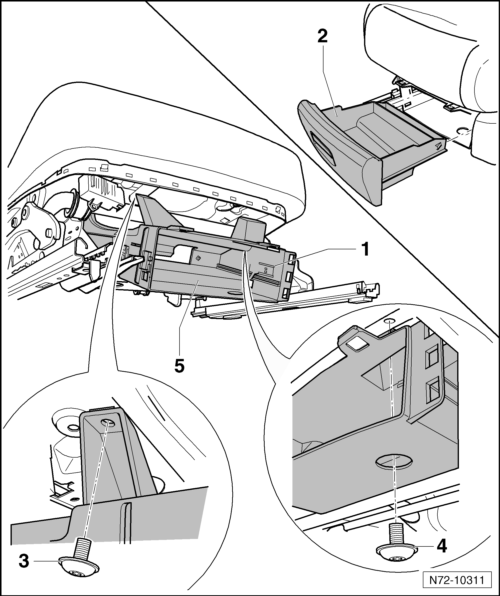
- Press the right and left tabs -1- outward and pull the drawer -2- out of the mount.
- Remove the two bolts -3- and -4- (2 Nm).
- Pull the drawer mount -5- out of the mounts in the seat frame.
Installing
- Install in reverse order of removal.
Front Seat Heating Control Module -J774-, Removing and Installing
Note
The control module is installed under the seat in the front.
Removing
- Switch off the ignition.
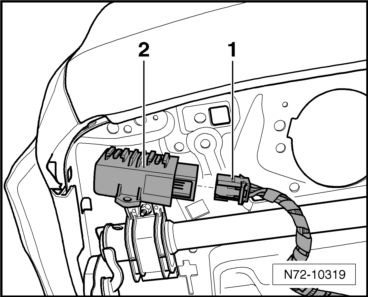
- Disconnect the wiring harness -1- from the control module -2-.
- Turn the control module clockwise and remove it from the seat frame.
Installing
- Install in reverse order of removal.
Lumbar Adjustment Lever, Removing and Installing
The lumbar adjustment lever is an option on the following seats:
- Front Seats with Manual Height Adjustment
- Passenger Seat with Pass-Through
Note
The following describes the removing and installing on the left side of the vehicle. Removing and installing on the right side is identical.
Removing
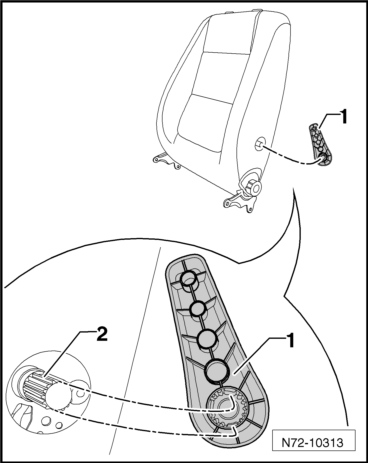
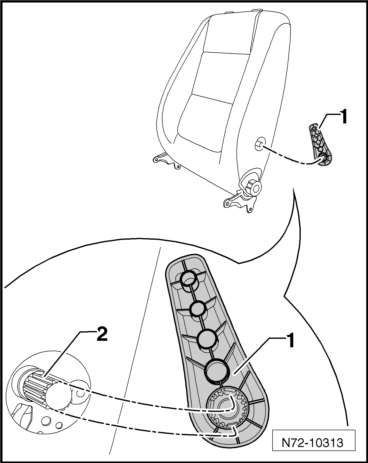
- Remove the lever from the shaft.
Installing
- Install in reverse order of removal.
Note
Make sure the splines in the lumbar adjustment lever -1- align with the splines on the shaft -2-.
Backrest Folding Table, Removing and Installing
The folding table is an option on the following seats:
- Front Seats with Manual Height Adjustment
- Passenger Seat with Pass-Through
- Power driver seat
Removing
- Remove the two left and right screws -1- and -2- (2.5 Nm).
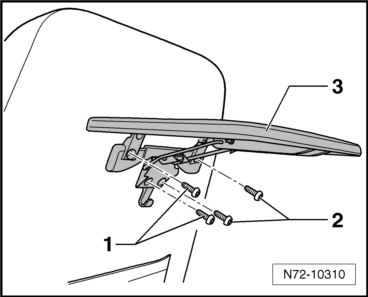
- Remove the folding table -2- from the backrest.
Installing
- Install in reverse order of removal.
Headrest, Removing and Installing, from 05/2011
The following describes the removing and installing on the left side of the vehicle. Removing and installing on the right side is identical.
Removing
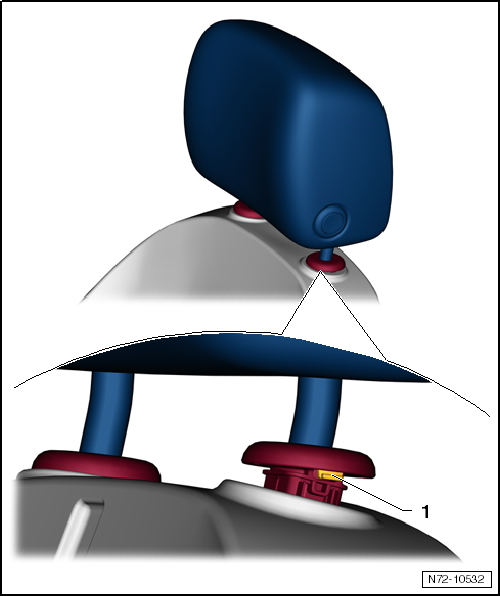
- Push the cushion near the headrest guides slightly downward.
- Push the locking plate -1- all the way toward the retainer on both headrest guides.
- Remove the headrest from the backrest.
Installing
- Install in reverse order of removal.
Headrest Guides, Removing
Note
Headrest guides are shown removed to provide a better illustration.
- Mount the Engine/Transmission Holder - Seat Repair Fixture -VAS6136- on the Engine and Gearbox Bracket -VAS6095A-.
- Remove the front seat.
- Secure the seat to the Engine/Transmission Holder - Seat Repair Fixture -VAS6136-.
- Press the release button if equipped and pull the headrest out of the backrest.
- Remove the headrest if equipped.
- Remove the front seat belt latch.
- Remove the tunnel-side trim panel.
- Remove the lumbar adjustment lever, if equipped.
Passenger Seat without Height Adjustment
- Remove the backrest adjustment wheel.
- Remove the sill-side trim panel.
Passenger Seat with Pass-Through
- Remove the sill-side trim panel.
Front Seats with Manual Height Adjustment
- Remove the backrest adjustment wheel.
- Remove the sill-side trim panel.
Power Driver Seat
- Remove the sill-side trim panel.
- Disconnect the two backrest motor wiring harnesses on the bottom side of the seat frame. Detach the wiring harnesses from the seat frame.
All Vehicles
- Remove the backrest.
- Remove the backrest and folding table, if equipped.
- Remove the cover and cushion from the front seat backrest.
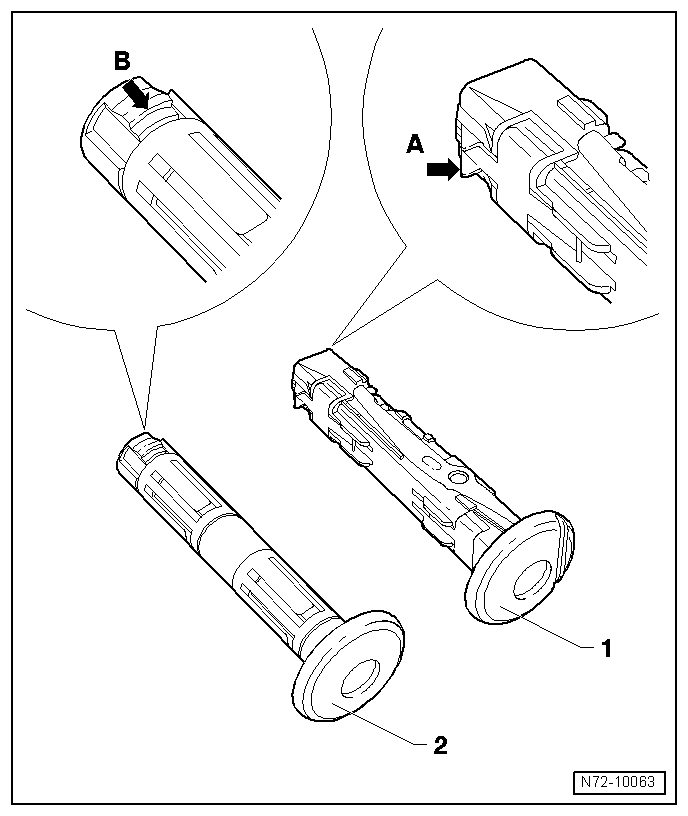
- Grasp in the backrest frame and operate headrest guide locking tab -arrow A- with button -1-.
- Remove headrest guide with button from the backrest.
- Grasp in backrest frame and operate headrest guide locking mechanism -arrow B--2-.
- Remove the headrest guide from the backrest.
Backrest, Removing and Installing
Note
The following describes the removing and installing on the left side of the vehicle. Removing and installing on the right side is identical.
Removing
- Mount the Engine/Transmission Holder - Seat Repair Fixture -VAS6136- on the Engine and Gearbox Bracket -VAS6095A-.
- Remove the front seat.
- Secure the seat to the Engine/Transmission Holder - Seat Repair Fixture -VAS6136-.
- Remove the front seat belt latch.
- Remove the tunnel-side trim panel.
Passenger Seat without Height Adjustment
- Remove the backrest adjustment wheel.
- Remove the sill-side trim panel.
Passenger Seat with Pass-Through
- Remove the sill-side trim panel.
Front Seats with Manual Height Adjustment
- Remove the backrest adjustment wheel.
- Remove the sill-side trim panel.
Power Driver Seat
- Remove the sill-side trim panel.
- Disconnect the two backrest motor wiring harnesses on the bottom side of the seat frame. Detach the wiring harnesses from the seat frame.
All seats
- Cut the cable tie from the mesh hose cable tie and pull the wiring harness from the side airbag through it.
Note
The following describes removing and installing a backrest on a manual seat. Removing and installing on a power seat is identical.
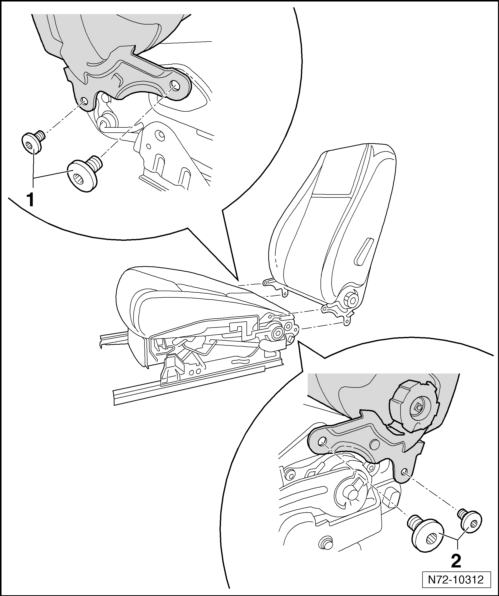
- Remove two bolts each on left and right sides -1- and -2- (34.5 Nm).
- Remove the backrest from the seat frame.
Installing
- Install in reverse order of removal.
 Seat Frames
...
 Front Seats with Manual Height Adjustment
Tools
Special tools and workshop equipment required
Torque Wrench 1783 - 2-10Nm -VAG1783-
Torque Wrench 1331 5-50Nm -VAG1331-
Engine and Gearbox Bracket VAS6095A -VAS6095A-
Engine/Transm ...
See More:
Volkswagen Tiguan Service and Repair Manual > Controls, Housing: Transmission Housing and Clutch Housing
Overview - Transmission Housing
Transmission Housing
When replacing: adjust the output shafts and differential.
Changes near the mount area for the cover/input shaft.
Allocate component according to the Parts Catalog
Cap
Removing.
Installing.
Oil Drain Plug
Tightening spe ...
Volkswagen Tiguan Owners Manual
Volkswagen Tiguan Service and Repair Manual
- Body exterior
- Body Interior
- General Paint Information
- Paint
- Brake System
- Suspension, Wheels, Steering
- Wheel and Tire Guide
- Towing Guide
- Wheel and Tire Guide General Information
- Communication
- Electrical Equipment General Information
- Electrical Equipment from 06/2011
- Heating, Ventilation and Air Conditioning
- Refrigerant R134a Servicing
- 6-Speed Manual Transmission 02Q, OBB, and OFB
