Volkswagen Tiguan Service and Repair Manual: Noise Insulation
Tools
Special tools and workshop equipment required
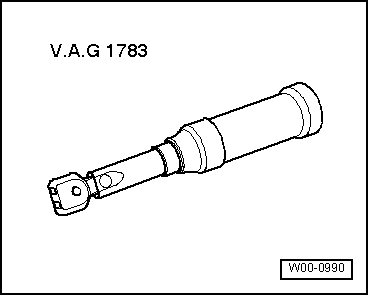
- Torque Wrench 1783 - 2-10Nm -VAG1783-
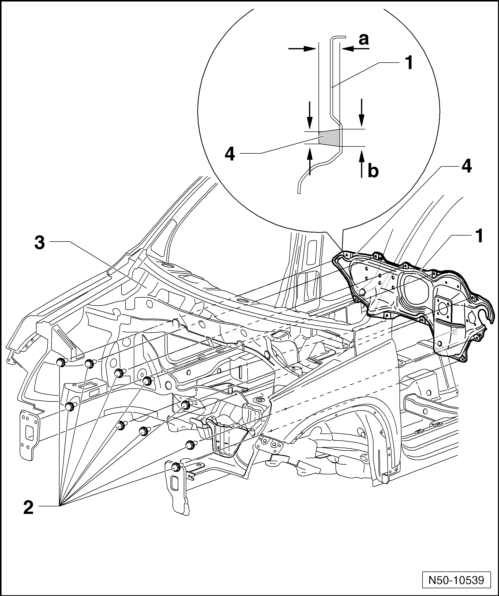
Overview - Noise Insulation, Long Version
Note
- Depending on the engine version, slight deviations must be considered when removing and installing.
- The screws -4- are micro-encapsulated and must be replaced after loosening.
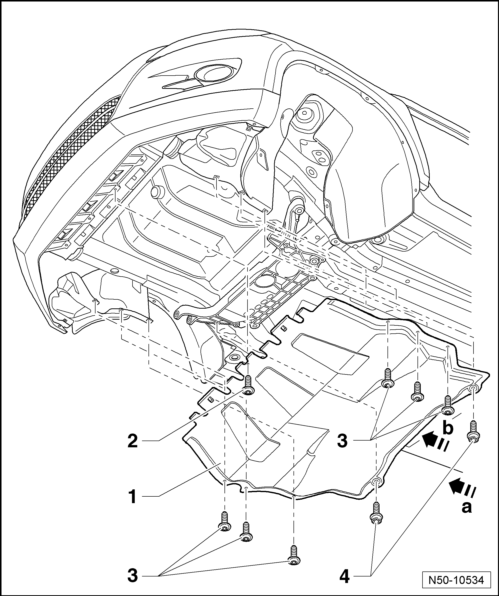
- Noise Insulation
- arrow a- points in the direction of travel
- Removing:
- Remove bolts -2, 3 and 4-.
- Pull the noise insulation toward the rear out of the lock carrier mounts.
- Installing:
- Push the noise insulation in the direction of -arrow b- into the lock carrier mounts.
- Tighten the bolts -2, 3 and 4-.
- Bolt
- Tightening specification: 2 Nm
- Quantity: 1
- Bolt
- Tightening specification: 2 Nm
- Quantity: 6
- Bolt
- Tightening specification: 6 Nm
- The screws are micro-encapsulated
- Always replace the bolts after loosening.
- Quantity: 2
Overview - Noise Insulation, Short Version
Note
Depending on the engine version, slight deviations must be considered when removing and installing.
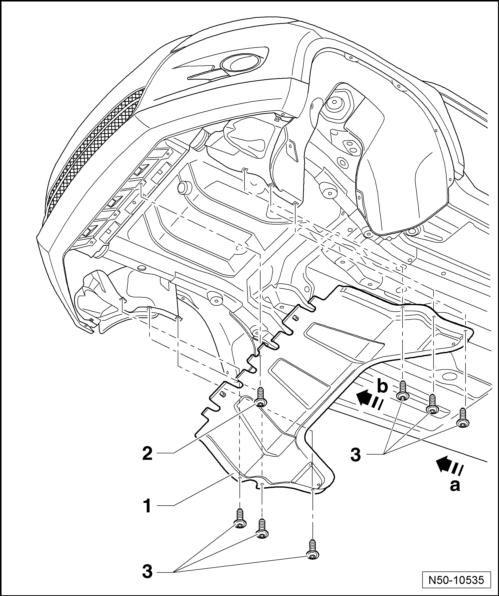
- Noise Insulation
- -arrow a- points in the direction of travel
- Removing:
- Remove the bolts -2 and 3-.
- Pull the noise insulation toward the rear out of the lock carrier mounts.
- Installing:
- Push the noise insulation in the direction of -arrow b- into the lock carrier mounts.
- Tighten the bolts -2 and 3-.
- Bolt
- Tightening specification: 2 Nm
- Quantity: 1
- Bolt
- Tightening specification: 2 Nm
- Quantity: 6
Impact Guard
- Impact Guard
- Bolt
- Tightening specification: 20 Nm
- Quantity: 2
- Bolt
- Tightening specification: 2 Nm
- Quantity: 6
- Bolt
- Tightening specification: 20 Nm
- Quantity: 3
- Bolt
- Tightening specification: 35 Nm.
- Quantity: 2
- Crossbrace
- Expanding Nut
- For mounting the bumper
Underbody Panel
Tools
Special tools and workshop equipment required
- Torque Wrench 1783 - 2-10Nm -VAG1783-
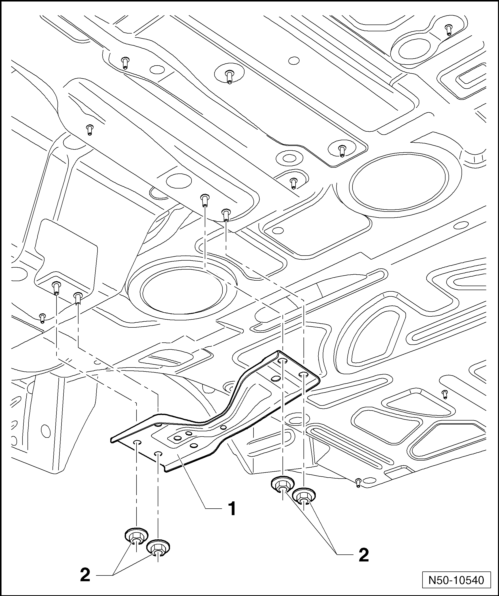
Overview - Underbody Trim Panels
Note
The illustration shows the right side. The left side is identical.
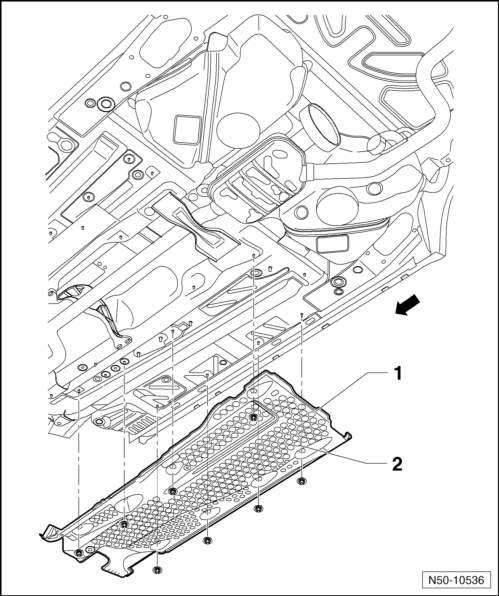
- Underbody Panel
- The -arrow- points in the direction of travel
- Removing:
- Remove the nuts -2- from the threaded pins.
- Removing:
- Tighten the nuts -2- on the threaded pins.
- Nut
- Tightening specification: 2 Nm
- Quantity: 8
Bulkhead
Tools
Special tools and workshop equipment required
- Torque Wrench 1331 5-50Nm -VAG1331-
- Cartridge Heater -VAG1939-
- Cartridge Gun -VAG1628-
Materials
| One-Part Window Adhesive | DH 009 100 03. |
| Activator | D 181 801 A1 |
| Glass Primer/Paint Primer | D 009 200 02. |
| Cleaning Solution | D 009 401 04. |
| Primer applicator | D 009 500 25. |
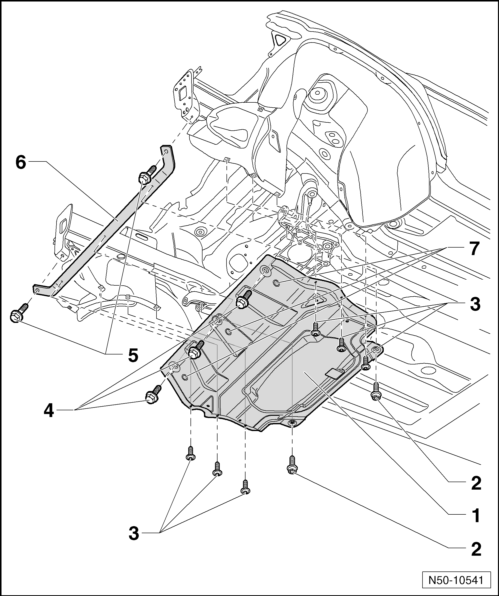
Overview - Bulkhead
Note
The bulkhead -1- is bolted and also bonded in with PUR adhesive sealing material -3-.
- Bulkhead
- Removing:
- After unscrewing of bolts -2-, cut through adhesive bead using workshop tools.
- Removing:
- Bolt
- Quantity: 10
- Tightening specification: 25 Nm
- PUR Adhesive Sealant
- -DH 009 100 03-
- Bead diameter: -Height a- = 10 mm, -Width b- = 8 mm
- Minimum Curing Time.
Crossbrace
- Crossbrace
- Nut
- Tightening specification: 20 Nm
- Quantity: 4
Special Tools
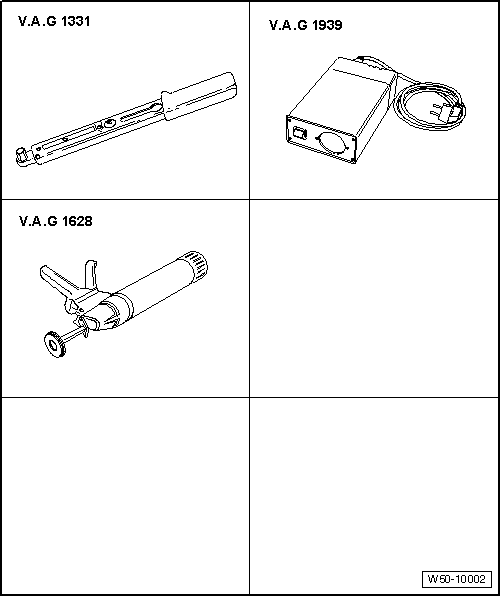
Special tools and workshop equipment required
- Torque Wrench 1331 5-50Nm -VAG1331-
- Grindstone Holder -VAG1939-
- Cartridge Gun -VAG1628-
- Torque Wrench 1783 - 2-10Nm -VAG1783-
 Fender
Tools
Special tools and workshop equipment required
Torque Wrench 1783 - 2-10Nm -VAG1783-
Overview - Front Fender
Note
The illustration shows the left side. The right side is identical.
Fender
...
 Hood, Lids
...
See More:
Volkswagen Tiguan Owners Manual > Changing light bulbs: Replacing light bulbs in the Halogen headlight
Fig. 201 In the engine compartment:
Cover ① on the left headlight for the low beam bulb holder ③ and cover ② for the
parking light bulb holder ④, turn signal bulb holder ⑤ and high beam or daytime
running light bulb ⑥.
Read and follow the introductory information and
safety info ...
Volkswagen Tiguan Owners Manual
Volkswagen Tiguan Service and Repair Manual
- Body exterior
- Body Interior
- General Paint Information
- Paint
- Brake System
- Suspension, Wheels, Steering
- Wheel and Tire Guide
- Towing Guide
- Wheel and Tire Guide General Information
- Communication
- Electrical Equipment General Information
- Electrical Equipment from 06/2011
- Heating, Ventilation and Air Conditioning
- Refrigerant R134a Servicing
- 6-Speed Manual Transmission 02Q, OBB, and OFB
