Volkswagen Tiguan Service and Repair Manual: Adaptive Chassis DCC Shock Absorber, AWD
Overview - Adaptive Chassis DCC Shock Absorber, AWD
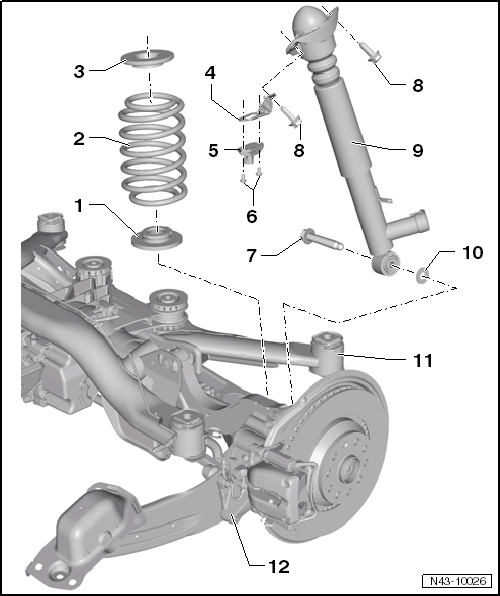
- Lower Spring Support
- Spring end rotated up to stop
- Coil Spring
- There are different suspension versions.
- Removing and installing.
- Upper Spring Support
- Bracket
- For Rear Body Acceleration Sensor -G343-
- Rear Body Acceleration Sensor -G343-
- Removing and installing.
- Note the installation position of the retainer -item 4-
- Bolt
- 5 Nm
- Always replace if removed
- Bolt
- 180 Nm
- M14 x 1.5 x 70
- Bolt
- 50 Nm + 45º
- Always replace if removed
- M10 x 35
- Shock Absorber
- Removing and installing.
- There are different suspension versions.
- Washer
- Lower Transverse Link
- Removing and installing.
- Wheel Bearing Housing
- Removing and installing.
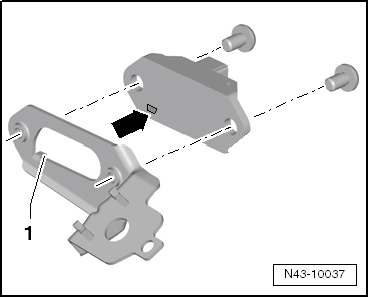
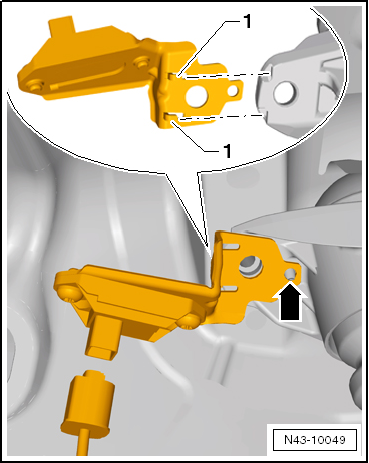
Installation Position Rear Body Acceleration Sensor -G343- on the Retainer
The tab on the retainer -1- must fit into the recess in the Rear Body Acceleration Sensor -G343--arrow-.

Rear Body Acceleration Sensor -G343-, Removing and Installing, AWD
Special tools and workshop equipment required
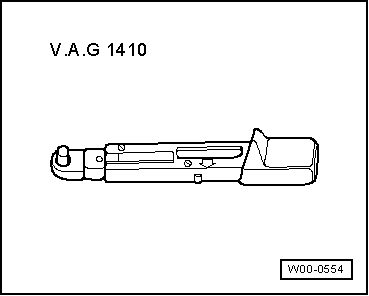
- Torque Wrench -VAG1410-
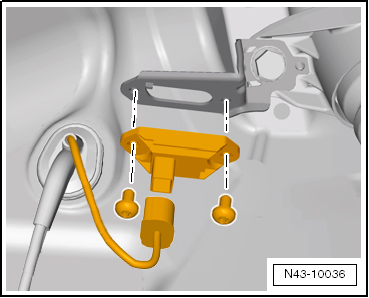
Removing
- Remove the wheel.
- Remove the left rear wheel housing liner.
- Disconnect the connector.
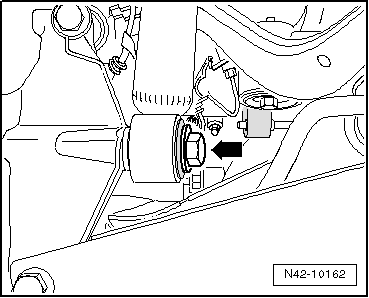
- Remove the bolts and remove the Rear Body Acceleration Sensor -G343-.
Installing
Install in reverse order of removal. Note the following:
Caution
The Rear Body Acceleration Sensor must never be interchanged with the Front Body Acceleration Sensors. Refer to the Parts Catalog.
- Note the Rear Body Acceleration Sensor -G343- installation position on the retainer.
The tab on the retainer -1- must fit into the recess in the Right Front Body Acceleration Sensor -G342--arrow-.
Tightening Specifications
| Component | Tightening Specification |
| Rear Body Acceleration Sensor -G343- to the retainer | 5 Nm |
Adaptive Chassis DCC Shock Absorber, AWD, Removing and Installing
Special tools and workshop equipment required
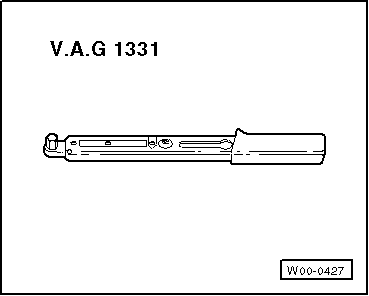
- Torque Wrench 1332 40-200Nm -VAG1332-
Removing
- Remove the wheel.
- Remove the wheel housing liner.
For the Left Shock Absorber Only
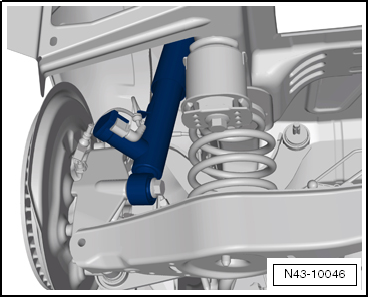
- Remove the Left Rear Level Control System Sensor -G76- from the lower transverse link.
Continuation for Both Sides
- Remove coil spring.
- Disconnect the connector and remove the wire from the shock absorber
- Remove the shock absorber bolts.
For the Left Shock Absorber Only
- Remove the Rear Body Acceleration Sensor -G343- from the shock absorber mount.
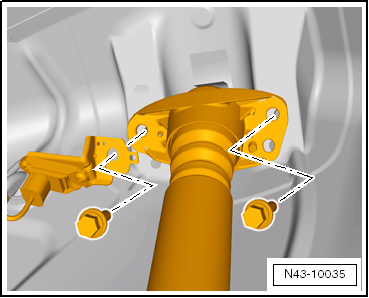
Continuation for Both Sides
- Remove the bolt -arrow-.
- Remove the shock absorber.

Installing
Install in reverse order of removal. Note the following:
Only bolt the shock absorber to the wheel bearing housing when the dimension "a" is reached.
Note the shock absorber installation position.
The Left and Right Rear Dampening Adjustment Valve -N338/N339- must point toward the outside of the rear wheel.
For the Left Shock Absorber Only
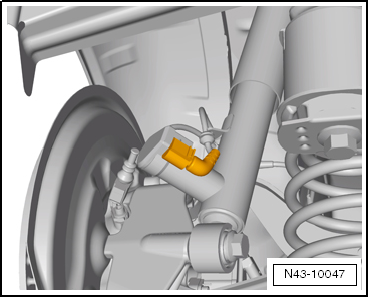
- Mount the Rear Body Acceleration Sensor -G343- on the shock absorber mount
- Mount the retainer on the shock absorber mount from the rear, so that the retainer tabs -1- fit into the depressions on the shock absorber mount.
- Turn the bracket forward so that it contacts the shock absorber mount.
The tab -arrow- is used for adjusting the Rear Body Acceleration Sensor -G343- bracket.
Continuation for Both Sides
- Install the shock absorber and tighten the bolts.
- Tighten the bolt -arrow-.
- Connect the connector to the Left and Right Rear Dampening Adjustment Valve -N338/N339-.
- Install coil spring.
For the Left Shock Absorber Only
- Connect the Left Rear Level Control System Sensor -G76- to lower transverse link.
Continuation for Both Sides
- Install the wheel housing liner.
- Install the wheel and tighten.
Tightening Specifications
| Component | Tightening Specification |
Shock absorber to body
|
50 Nm + 45º |
Shock absorber to wheel
bearing housing.
|
180 Nm |
| Left Rear Level Control System Sensor -G76- to lower transverse link | 5 Nm |
Adaptive Chassis DCC Shock Absorber, AWD, Servicing
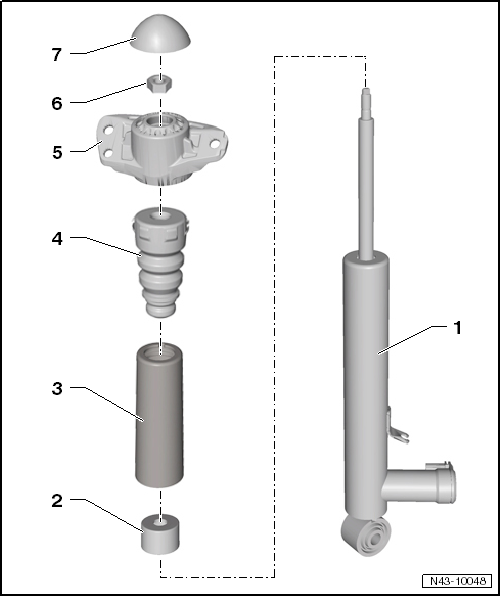
- Shock Absorber with Left and Right Rear Dampening Adjustment Valve
-N338/N339-
- Removing and installing.
- Protective Cap
- Protective Pipe
- Stop Buffer
- Allocation. Refer to the Parts Catalog.
- Shock Absorber Mount
- Allocation. Refer to the Parts Catalog.
- Nut
- 25 Nm
- Always replace if removed
- M10 x 1.0
- Loosening and tightening.
- Cover
Shock Absorber, Disassembling and Assembling
Special tools and workshop equipment required
- Torque Wrench 1332 40-200Nm -VAG1332-
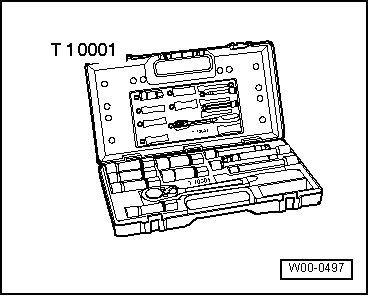
- Shock Absorber Set -T10001-
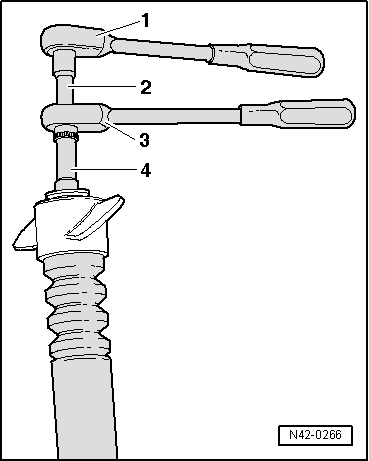
Loosening and Tightening Bolted Connection for Shock Absorber Mount
- Ratchet (commercially available)
- Shock Absorber Set - Extension with Counter Holder 1 -T10001/9-
- Shock Absorber Set - Reversible Ratchet -T10001/11-
- Shock Absorber Set - Socket -T10001/1-
Tightening Specification
| Component | Tightening Specification |
Shock absorber mounting to
shock absorber
|
25 Nm |
Special Tools
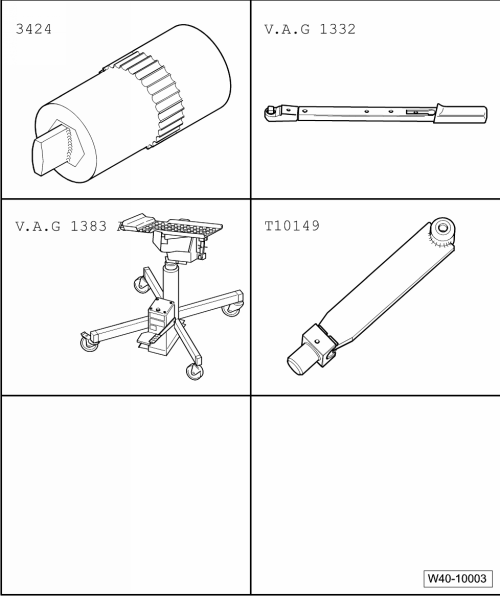
Special tools and workshop equipment required
- Spreader Tool -3424-
- Torque Wrench 1332 40-200Nm -VAG1332-
- Engine and Gearbox Jack -VAS6931-
- Engine/Gearbox Jack Adapter - Wheel Hub Support -T10149-
- Shock Absorber Set -T10001-
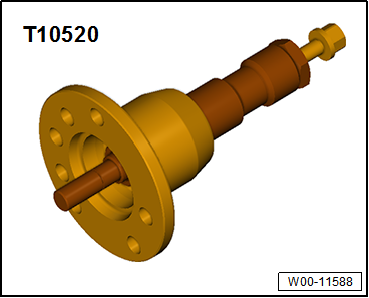
- Drive Shaft Remover -T10520-
- Torque Wrench 1331 5-50Nm -VAG1331-
- Torque Wrench -VAG1410-
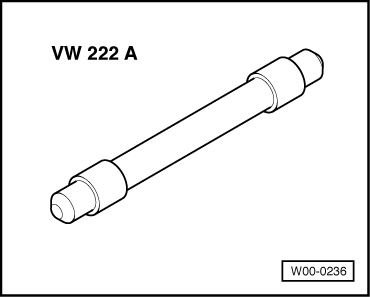
- Pilot Drift -VW222A-
 Adaptive Chassis DCC Shock Absorber, FWD
Overview - Adaptive Chassis DCC Shock Absorber, FWD
Lower Spring Support
Spring end rotated up to stop
Coil Spring
There are different suspension versions.
Removing and installing.
...
 Wheels, Tires, Wheel Alignment
Evaluating Accident Vehicles
A test list for assessing suspension on accident vehicles can be found here.
Refer to
→ Chapter "Chassis Evaluation Checklist for Accident Vehicles".
Tightening S ...
See More:
Volkswagen Tiguan Service and Repair Manual > Controls, Housing: Subframe Mount
Overview - Subframe Mount
Bolt
Engine Support
Engine Mount
Bolt
Bolt
Bolt
Bolt
Pendulum Support
Bolt
For pendulum support to subframe
Bolt
For pendulum support to transmission
Transmission with threaded insert.
Bolt
For pendulum support to transmission
Transmission wi ...
Volkswagen Tiguan Owners Manual
Volkswagen Tiguan Service and Repair Manual
- Body exterior
- Body Interior
- General Paint Information
- Paint
- Brake System
- Suspension, Wheels, Steering
- Wheel and Tire Guide
- Towing Guide
- Wheel and Tire Guide General Information
- Communication
- Electrical Equipment General Information
- Electrical Equipment from 06/2011
- Heating, Ventilation and Air Conditioning
- Refrigerant R134a Servicing
- 6-Speed Manual Transmission 02Q, OBB, and OFB
