Volkswagen Tiguan Service and Repair Manual: Rear Lid, Removing and Installing
Volkswagen Tiguan Service and Repair Manual / Body exterior / Sunroof / Rear Lid, Removing and Installing
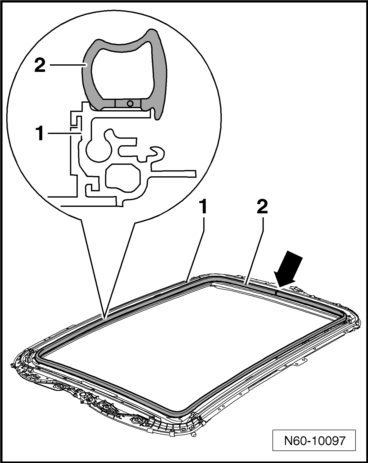
Removing
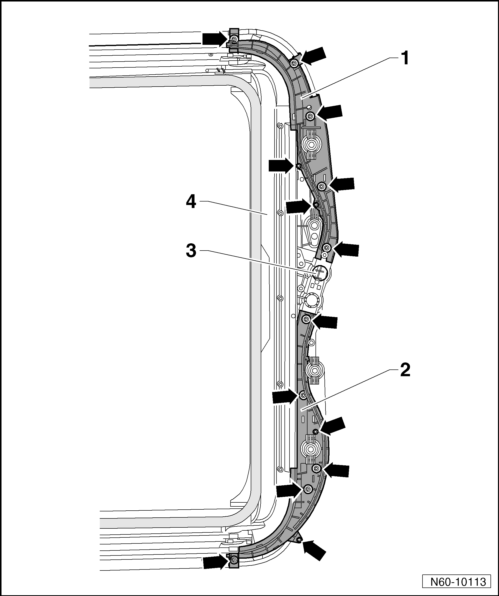
- Remove the assembly frame from the vehicle.
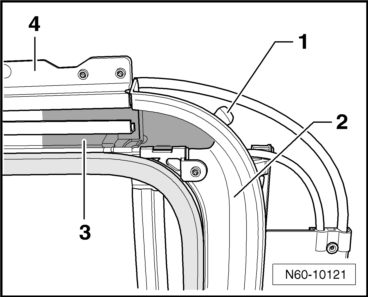
- Remove the inner seal -2- from the assembly frame -1-.
- Remove the sun shade.
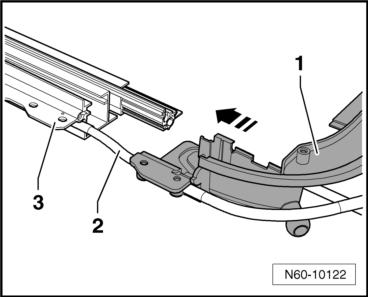
- Loosen the wiring harness from the rear lid.
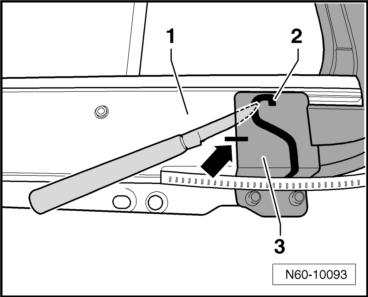
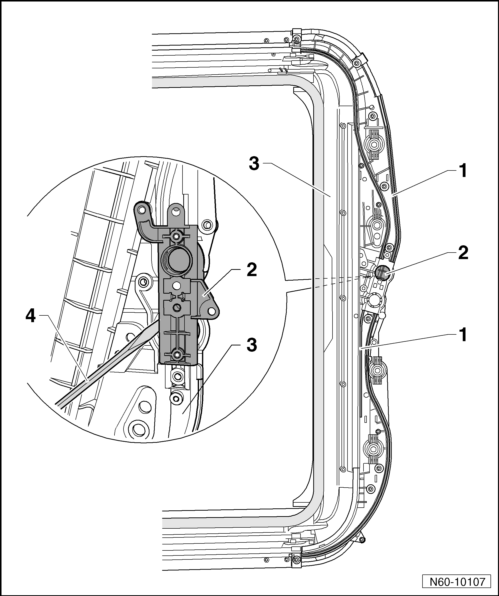
- Remove the screws -3- from the rear lid -2- on the guide rail -1- .

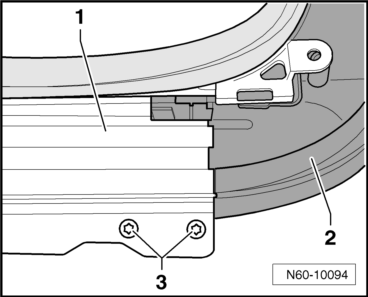
- Mark the location -arrow- on the rear lid -3- for later assembly.
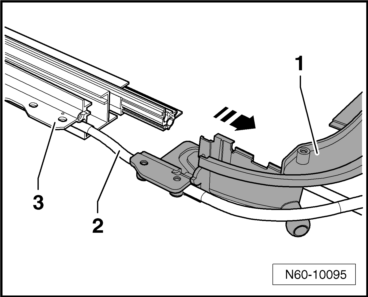
- Cut the bonded joint -2- between the guide rail -1- and the rear lid -3- using a knife.
- Pull the complete rear lid -1- together with the drain tubes -2- in the direction of the -arrow- from the guide rails -3- .
Installing
- Remove any adhesive residue using Adhesive Strip Remover - VAS6349-.
- Clean the adhesive surfaces on the rear section and the guide rails with cleaning solution -D 009 401 04-.
- Press a Butyl Adhesive Sealing Cord - AKD 497 010 04 R10--2- with a 3.5 mm diameter into the adhesive channel on the rear section -1- as shown.
- Pull the complete rear lid -1- together with the drain tubes -2- in the direction of the -arrow- from the guide rails -3- .
- Tighten the rear lid screws -3--2- on the guide rail -1- to 2 Nm.
Note
Prior to installation, check the assembly frame for leaks.
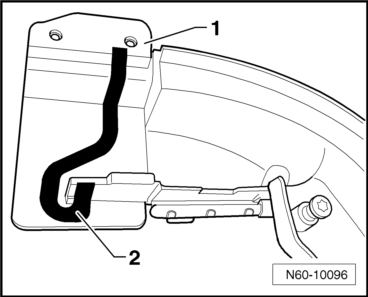
- Seal the water drain hole -1-.
- Fill the area -3- between the rear lid -2- and the guide rails -4- with water.
- Wait at least 5 minutes and then check for leaks.
- Seal any leaks with Butyl Adhesive Sealing Cord - AKD 497 010 04 R10-.
- Install the sun shade.
- Install the sun shade motor.
- Install a new inner seal.
- Install the assembly frame.
- Perform a panorama sunroof motor adaptation after completing all work.
Motor Support, Removing and Installing
Removing
- Remove the assembly frame from the vehicle.
- Remove sunroof motor.
- Remove the bolts -arrows- (2 Nm).
- Remove the cable covers -1 and 2- from the rear lid -4-.
- Remove the cable ends -1- from the motor support -2-.
- Pry the motor plate -1- out of the front section -2- using a suitable screwdriver -4-.
Installing
Install in reverse order of removal.
Note
Do not lubricate the sun shade slide cables and motor support.
- Install the sunroof motor.
- Install the assembly frame.
- After completing all the work, perform a sun shade motor adaptation.
 Assembly Frame, Removing and Installing
Removing
Note
At least two technicians are needed for removing and installing the
assembly frame.
Remove the headliner.
Vehicles with Screen Separator Wall:
Remove the screen separator bracke ...
 Front Sunroof Glass Panel Tilt Mechanism and Cable, Removing and Installing
Removing
Remove the front glass panel.
Remove the rear glass panel.
Remove the assembly frame from the vehicle.
Remove sunroof motor.
Remove the rear lid from the assembly frame.
Push the ...
See More:
Volkswagen Tiguan Owners Manual > Care, cleaning, maintenance: Reporting Safety Defects
If you live in Canada and you believe that your vehicle has a defect that could
cause a crash, injury or death, you should immediately inform Transport Canada,
Defect Investigations and Recalls. You should also notify Volkswagen Canada, Inc.
Transport Canada
Canadian customers who wish to repo ...
Volkswagen Tiguan Owners Manual
Volkswagen Tiguan Service and Repair Manual
- Body exterior
- Body Interior
- General Paint Information
- Paint
- Brake System
- Suspension, Wheels, Steering
- Wheel and Tire Guide
- Towing Guide
- Wheel and Tire Guide General Information
- Communication
- Electrical Equipment General Information
- Electrical Equipment from 06/2011
- Heating, Ventilation and Air Conditioning
- Refrigerant R134a Servicing
- 6-Speed Manual Transmission 02Q, OBB, and OFB

© 2018-2026 Copyright www.vwtiguan.org - 0.0744