Volkswagen Tiguan Owners Manual: Changing the light bulb in the license plate lamp
Volkswagen Tiguan Owners Manual / Do it yourself / Changing light bulbs / Changing the light bulb in the license plate lamp

Fig. 209 In the rear hatch: Clamped license plate lamp.
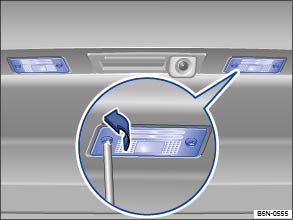
Fig. 210 In the rear hatch: Screwed license plate lamp.
 Read and follow the introductory information and
safety information first⇒
Read and follow the introductory information and
safety information first⇒ Introduction
to the subject
Introduction
to the subject | Please carry out each step only in the order specified: | ||
|---|---|---|
| Clamped license plate lamp | Screwed license plate lamp | |
| 1. | Please review and follow the checklist ⇒ Information on light bulb replacement . | |
| 2. | Press the flat blade of the screwdriver from the vehicle tool kit in the direction of the arrow in the notch in the license plate lamp ⇒ Fig. 209 . | Remove the screws of the license plate lamp with the screwdriver from the vehicle tool kit. |
| 3. | Pull out the license plate lamp slightly. The connector must not be separated for this. | |
| 4. | Replace the burned out light bulb with a new bulb of the same type. | |
| 5. | Carefully insert the license plate lamp into the opening in the bumper. Ensure that the license plate lamp is installed in the correct direction. | Carefully insert the license plate lamp into the opening in the bumper. Make sure that the adhesive anti-glare strip faces forward. |
| 6. | Press the license plate lamp into the bumper until it audibly latches. | Tighten the securing screws of the license plate lamp with the screwdriver. |
 Changing taillight bulbs in the vehicle body
Fig. 207 In the side of the luggage
compartment: releasing the tail light, removing the trim panel and removing the
screws.
Fig. 208 Removed tail light: removing
the bulb holder and replacing t ...
 Changing the light bulb in the backup lamp
Read and follow the introductory information and
safety information first⇒Introduction
to the subject The light bulbs for the backup lights are Lifetime bulbs with
a very long service life. ...
See More:
Volkswagen Tiguan Owners Manual > Storage areas: Storage compartment in the lower center console
Fig. 113 In the lower center console:
Storage compartment.
Read and follow the introductory information and
safety information first⇒Introduction
to the subject This storage compartment can be used for storing small items or
other light objects.
To open, briefly press and release the s ...
Volkswagen Tiguan Owners Manual
Volkswagen Tiguan Service and Repair Manual
- Body exterior
- Body Interior
- General Paint Information
- Paint
- Brake System
- Suspension, Wheels, Steering
- Wheel and Tire Guide
- Towing Guide
- Wheel and Tire Guide General Information
- Communication
- Electrical Equipment General Information
- Electrical Equipment from 06/2011
- Heating, Ventilation and Air Conditioning
- Refrigerant R134a Servicing
- 6-Speed Manual Transmission 02Q, OBB, and OFB

© 2018-2026 Copyright www.vwtiguan.org - 0.0772