Volkswagen Tiguan Service and Repair Manual: Instrument Panel Lamps and Switches
Light Switch -E1-
Light Switch -E1-, Removing and Installing
The Light Switch -E1- is installed inside the instrument panel next to the driver door.
The following components are integrated in the Light Switch -E1-:
- Fog Lamp Switch -E7-
- Rear Fog Lamp Switch -E18-
- Headlamp Switch Illumination Bulb -L9-
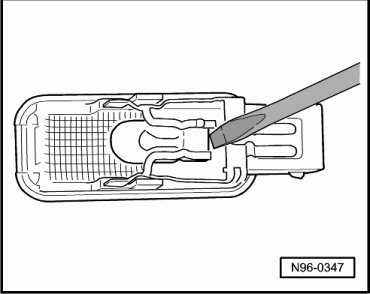
Removing
- Switch off the ignition and all electrical consumers and remove the ignition key.
- Turn the rotating handle of the light switch to position "0".
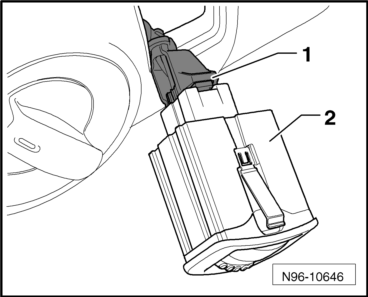
- Press the light switch -arrow 1- and turn it slightly to the right -arrow 2-.
- Hold rotary handle in this position and remove light switch on rotary handle from instrument cluster -arrow 3-.
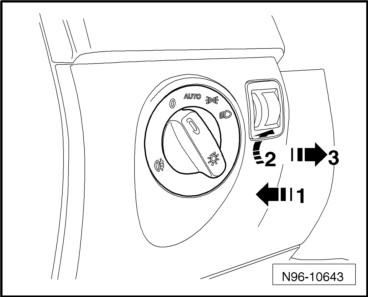
- Disconnect the connector -arrow-.
Installing
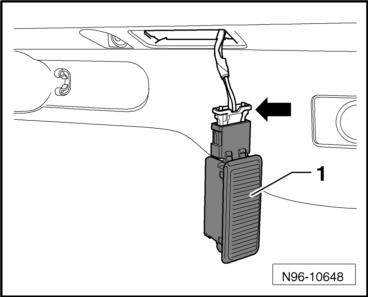
- Connect the connector to the light switch.
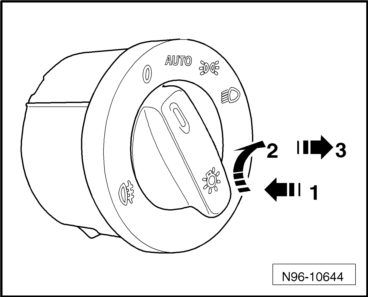
- Hold light switch firmly and press in rotary handle of light switch -arrow 1- and turn slightly toward right -arrow 2-.
- Hold rotary handle in this position and insert light switch into instrument cluster.
- Turn rotary handle to position "0", release and engage switch.
Instrument Panel and Switch Illumination Dimmer Switch -E20- and Headlamp Range Control Adjuster -E102-
Instrument Panel and Switch Illumination Dimmer Switch -E20- and Headlamp Range Control Adjuster -E102-, Removing and Installing
Special tools and workshop equipment required
- Trim Removal Wedge -3409-
The Instrument Panel And Switch Illumination Dimmer Switch -E20- and Headlamp Range Control Adjuster -E102- are installed inside the instrument panel, next to the light switch.
Note
- When removing and installing components in visible area (switches, covers, trim, etc.), cover by taping the areas at which a prying tool (Trim Removal Wedge -3409-, screwdriver) will be positioned using commercially available adhesive tape.
- Depending the on vehicle equipment level, either just an instrument panel light dimmer switch is installed or a combination instrument panel light dimmer switch with the headlamp adjuster.
- Removal and installation of both components is performed in the same manner.
Removing
- Switch off the ignition and all electrical consumers and remove the ignition key.
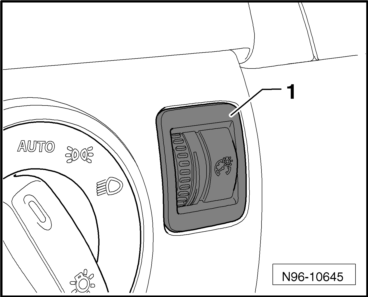
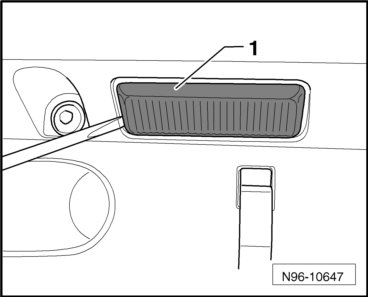
- Remove the Instrument Panel And Switch Illumination Dimmer Switch -E20--1- from the instrument panel using a Trim Removal Wedge -3409-.
- Disconnect the connector -1- and remove the Instrument Panel And Switch Illumination Dimmer Switch -E20--2-.
Installing
Install in reverse order of removal.
Glove Compartment Lamp -W6-
Glove Compartment Lamp -W6-, Removing and Installing
Special tools and workshop equipment required
- Trim Removal Wedge -3409-
Note
When removing and installing components in visible area (switches, covers, trim, etc.), cover by taping the areas at which a prying tool (Trim Removal Wedge -3409-, screwdriver) will be positioned using commercially available adhesive tape.
Removing
- Switch off the ignition and all electrical consumers and remove the ignition key.
- Carefully remove the diffusion lens -1- using a Trim Removal Wedge -3409- or a screwdriver.
- Release and disconnect the connector -arrow- and remove the Glove Compartment Lamp -W6--1-.
Installing
Install in reverse order of removal. Note the following:
- Check the glove compartment switch function. The glove compartment lamp must not light up when the cover is closed.
Glove Compartment Lamp -W6- Bulb, Replacing
Removing
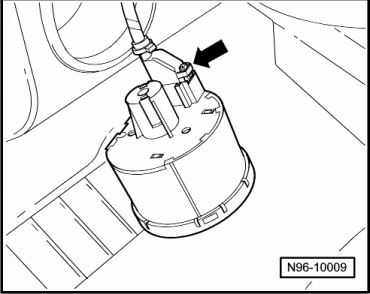
- Remove the Glove Compartment Lamp -W6-.
- Open the retaining tabs -1- and remove the heat shield -2- from the lamp diffusion lens.
- Remove the bulb from the socket.
- Glove compartment lamp bulb: glass base bulb 12V, 5W.
Installing
Install in reverse order of removal. Note the following:
- Check the glove compartment switch function. The glove compartment lamp must not light up when the cover is closed.
Glove Compartment Lamp Switch -E26-
Glove Compartment Lamp Switch -E26-, Removing and Installing
The glove compartment lamp switch is located on the rear side of the glove compartment.
Note
When removing and installing components in visible area (switches, covers, trim, etc.), cover by taping the areas at which a prying tool (Trim Removal Wedge -3409-, screwdriver) will be positioned using commercially available adhesive tape.
Removing
- Switch off the ignition and all electrical consumers and remove the ignition key.
- Remove the glove compartment.
- Releases the tabs -arrows- and remove the Glove Compartment Lamp Switch -E26--1-.
Installing
Install in reverse order of removal. Note the following:
- Check the glove compartment switch function. The glove compartment lamp must not light up when the cover is closed.
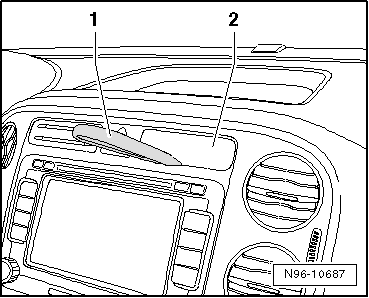
Front Passenger Airbag -Disabled- Indicator Lamp -K145-
Front Passenger Airbag -Disabled- Indicator Lamp -K145-, Removing and Installing
Special tools and workshop equipment required
- Trim Removal Wedge -3409-
The front passenger airbag disabled indicator lamp is located in the center of the dash panel above the radio.
WARNING
- Risk of airbag deployment.
- The airbag unit could deploy if mishandled.
- Follow the safety precautions when working on the airbag.
Note
When removing and installing components in visible area (switches, covers, trim, etc.), cover by taping the areas at which a prying tool (Trim Removal Wedge -3409-, screwdriver) will be positioned using commercially available adhesive tape.
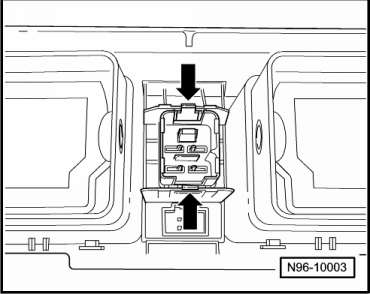
Removing
- Switch off the ignition and all electrical consumers and remove the ignition key.
- Attach the Trim Removal Wedge -3409--1- underneath and in the center of the Front Passenger Airbag -Disabled- Indicator Lamp -K145--2-.
- With a flat hand, hit the Trim Removal Wedge -3409- to release the indicator lamp bulb.
- Disconnect the connector -arrow- and remove the indicator lamp -1-.
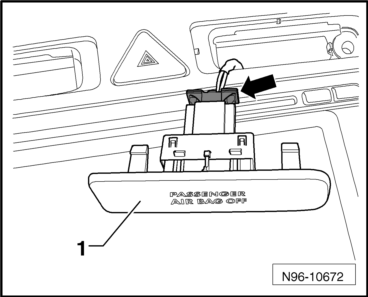
Installing
Install in reverse order of removal.
Emergency Flasher Switch -E3-
Emergency Flasher Switch -E3-, Removing and Installing
The Emergency Flasher Switch -E3- is located in the center of the instrument panel above the radio.
Note
When removing and installing components in visible area (switches, covers, trim, etc.), cover by taping the areas at which a prying tool (Trim Removal Wedge -3409-, screwdriver) will be positioned using commercially available adhesive tape.
Removing
- Switch off the ignition and all electrical consumers and remove the ignition key.
- Remove the center vent.
- Release and disconnect the connectors -arrows-.
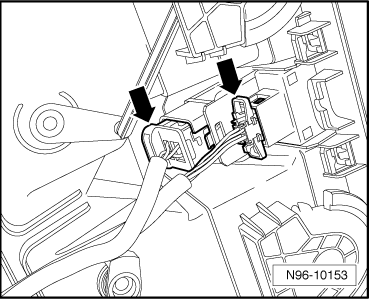
- Release the tabs -arrows- and remove the emergency lamp switch.
Installing
Install in reverse order of removal.
Footwell Lamps
Left Footwell Lamp -W9- and Right Footwell Lamp -W10-, Removing and Installing
Special tools and workshop equipment required
- Trim Removal Wedge -3409-
The Left Footwell Lamp -W9- and Right Footwell Lamp -W10- are installed in the footwell trim panels on the driver and front passenger sides.
Note
- When removing and installing components in visible area (switches, covers, trim, etc.), cover by taping the areas at which a prying tool (Trim Removal Wedge -3409-, screwdriver) will be positioned using commercially available adhesive tape.
- The illustrations show the procedure for removing and installing the right footwell lamp. Removing and installing the left footwell lamp is identical.
Removing
- Switch off the ignition and all electrical consumers and remove the ignition key.
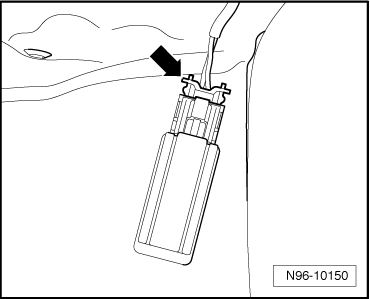
- Remove the footwell lamp from the trim panel under the instrument panel using the Trim Removal Wedge -3409- or a screwdriver.
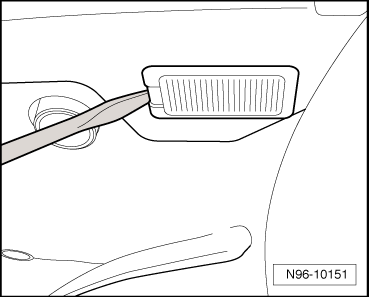
- Release and disconnect the connector -arrow- and remove the footwell lamp.
Installing
Install in reverse order of removal.
Footwell Lamp Bulb, Replacing
The Left Footwell Lamp -W9- and Right Footwell Lamp -W10- are installed in the footwell trim panels on the driver and front passenger sides.
Removing
- Remove the footwell lamp.
- Open the retaining tabs -1- and remove the heat shield -2- from the lamp diffusion lens.

- Remove the bulb from the socket.
- Footwell lamp bulb: glass base bulb 12V, 5W.

Installing
Install in reverse order of removal.
Front Passenger Airbag Deactivation Key Switch -E224-
Front Passenger Airbag Deactivation Key Switch -E224-, Removing and Installing
The Front Passenger Airbag Deactivation Key Switch -E224- is installed inside the glove compartment on the front passenger side.
Special tools and workshop equipment required
- Trim Removal Wedge -3409-
WARNING
- Risk of airbag deployment.
- The airbag unit could deploy if mishandled.
- Follow the safety precautions when working on the airbag.
Note
When removing and installing components in visible area (switches, covers, trim, etc.), cover by taping the areas at which a prying tool (Trim Removal Wedge -3409-, screwdriver) will be positioned using commercially available adhesive tape.
Removing
- Switch off the ignition and all electrical consumers and remove the ignition key.
- Insert the ignition key -2- in the Front Passenger Airbag Deactivation Key Switch -E224--1- and carefully release the switch on the right side in the direction of -arrow- while the ignition key is in the vertical position.
- Release the left side of the Front Passenger Airbag Deactivation Key Switch -E224--1- using the Trim Removal Wedge -3409--2-.
- Disconnect the connector -2- and remove the front passenger airbag deactivation key switch -E224--1-.
Installing
Install in reverse order of removal.
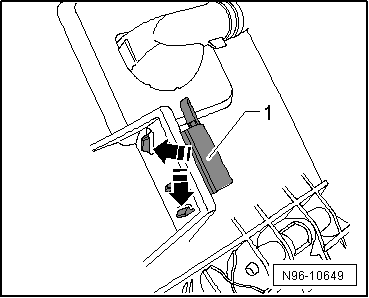
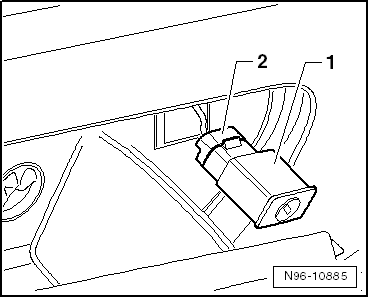
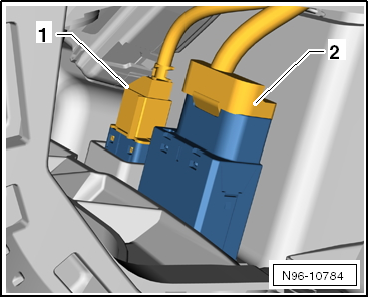
Tire Pressure Monitoring Button -E226-
Tire Pressure Monitoring Button -E226-, Removing and Installing
The Tire Pressure Monitoring Button -E226- is installed in the glove compartment.
Removing
- Switch off the ignition and all electrical consumers and remove the ignition key.
- Remove the glove compartment.
- Disconnect the connector -1- and remove the button from the glove compartment from the inside.
Installing
Install in reverse order of removal.
 Interior Lamps and Switches
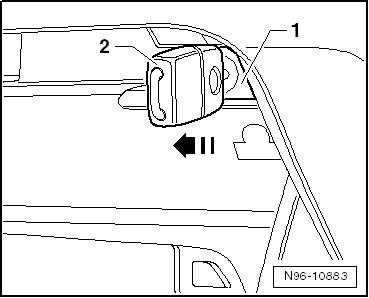
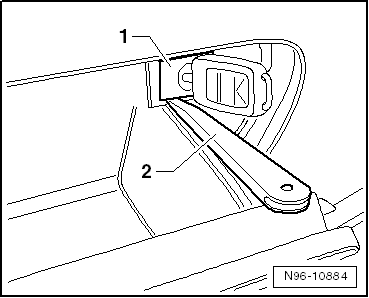
Interior Monitoring Deactivation Switch -E267-
Interior Monitoring Deactivation Switch -E267-, Removing and Installing
The Interior Monitoring Deactivation Switch -E267- is installed inside the
B-pil ...
 Front Door Lamps and Switches
Driver Side Switch Cluster
Driver Side Switch Cluster, Removing and Installing
Special tools and workshop equipment required
Trim Removal Wedge -3409-
Depending on the vehicle equipment, the follow ...
See More:
Volkswagen Tiguan Service and Repair Manual > Controls, Housing: Bevel Box
Overview - Bevel Box
Bolt
Tightening specification.
Heat Shield
For drive axle
Nut
Quantity: 2 or 3
Tightening specification.
Bolt
Only on bevel box "0CN" for the heat shield at the bevel box
Tightening specification
Heat Shield
For driveshaft
Only on bevel ...
Volkswagen Tiguan Owners Manual
Volkswagen Tiguan Service and Repair Manual
- Body exterior
- Body Interior
- General Paint Information
- Paint
- Brake System
- Suspension, Wheels, Steering
- Wheel and Tire Guide
- Towing Guide
- Wheel and Tire Guide General Information
- Communication
- Electrical Equipment General Information
- Electrical Equipment from 06/2011
- Heating, Ventilation and Air Conditioning
- Refrigerant R134a Servicing
- 6-Speed Manual Transmission 02Q, OBB, and OFB
